6 articles Articles posted in pork

Stir-Fried Lemongrass Spare Ribs (suon heo sa)

Lemongrass is one of my favorite ingredients. It seems impossible for anything to taste bad if there’s lemongrass in it. (I think this is also true of coconut milk.) It’s one of those pleasing and in no way offensive Asian flavors that you can easily serve to folks who want to try something exotic and different but aren’t ready for something like shrimp paste or fermented black beans. I especially love marinating meats with lemongrass and then grilling them up, whether DIY-style at the table, on a grill, or even at a campsite. When raw, I find that the lemongrass fragrance can be quite grassy sometimes and a bit overwhelming in large doses (like in tea), but when grilled, the flavor becomes more subdued and complex, with a smoky citrus undertone.

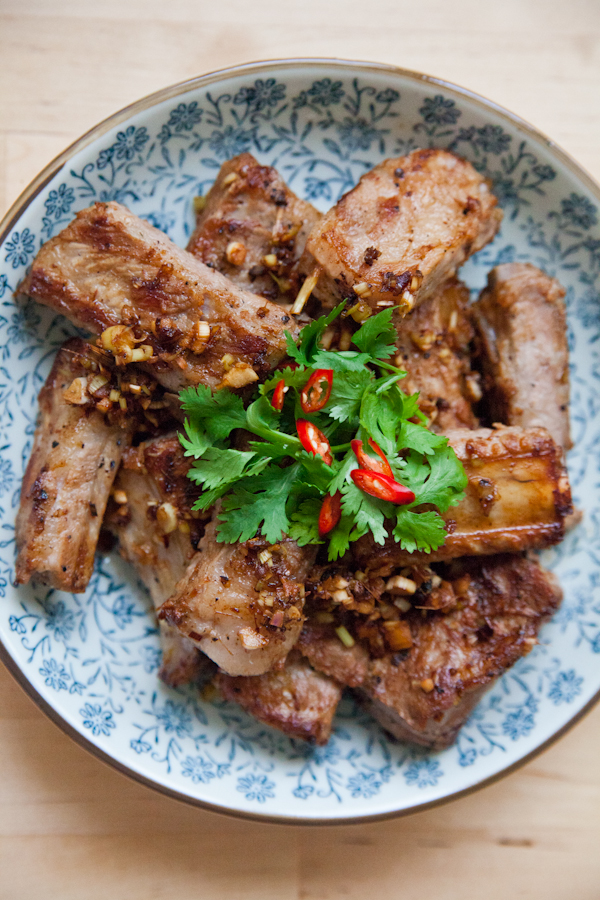
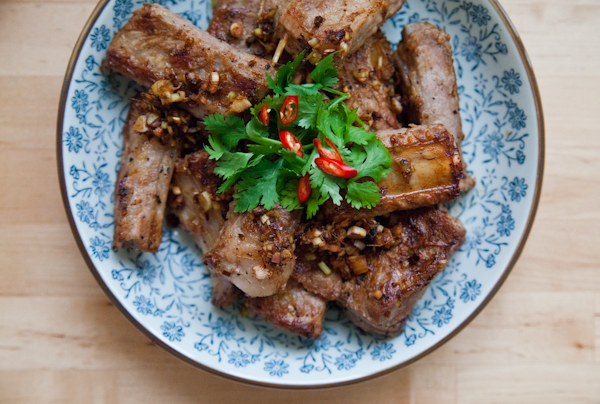
For simple, everyday meals, though, you don’t necessarily have to grill to get that great smoky lemongrass aroma. Stir-frying is an even easier way to achieve a similar flavor. These stir-fried lemongrass spare ribs showed up often at our dinner table when I was growing up. Only recently have I begun making this dish myself, and given how easy it is and how much we all love it, I really don’t know why it took me so long to incorporate it into our family meals. The marinade can work with other types of meats and cuts as well, if you wanted to do pork chops or pan-fried chicken thighs or drumsticks.

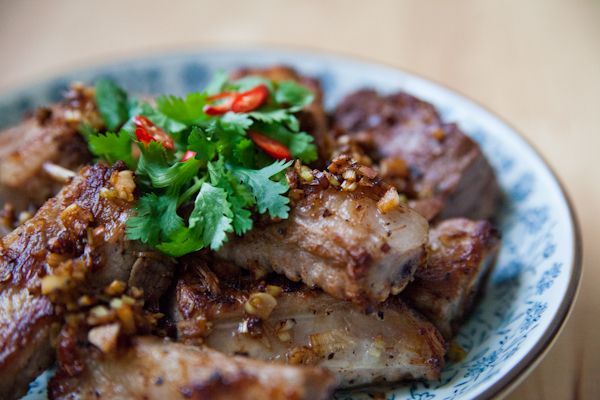
My favorite part, just as much now as when I was a kid, is the crispy charred bits of lemongrass and garlic. I added extra to this recipe just so I’d end up with more of it! Growing up, we’d mix it in with our rice to eat. Here, I had some leftover rice in the fridge (it’s actually a mixture of brown rice and lentils in the pictures, which is how we eat our rice these days), so I ended up just making fried rice straight in the pan after I took the ribs out, scraping up all the best browned bits with it.

Mom’s Stir-Fried Lemongrass Spare Ribs (Sườn Heo Sả)
Serves 2-4 as part of a larger meal

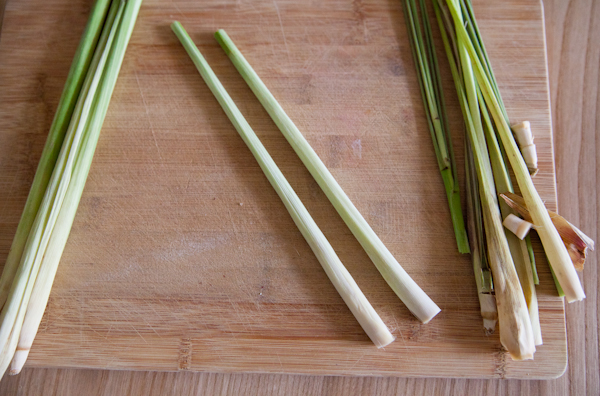
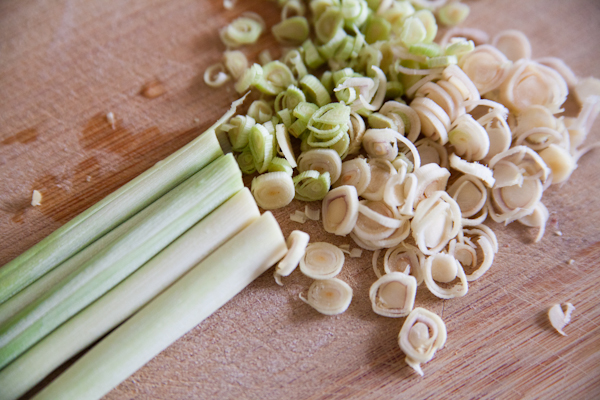
If you haven’t used lemongrass before, it can be a bit of an odd ingredient. It’s shaped like scallions or leeks, but texturally it’s much more like a stalk or a stem. Get the freshest you can find, and try to work with it soon after purchase, because once it’s dried out a bit it becomes very fibrous and tough to cut (this is less of an issue if you’re using it whole to flavor soups and curries). You can also buy chopped frozen lemongrass by the tub from the freezer case at many Asian grocery stores, which is a fine substitute.

lemongrass

To prepare the lemongrass, peel off the outer dry layers and cut off the dried section at the top of the stalk. Cut the stalk into smaller sections, bunch up the sections, and slice thinly crosswise. Then go over the thin slices a few times with your knife until you have a rough mince. The pieces don’t need to be too finely minced or else they will easily burn. Alternatively, you can chop in a food processor. Minced lemongrass freezes well, so you can chop up a large batch at a time and freeze in portions in an ice cube tray.

IMG_6662IMG_6664

The lemon juice in this recipe supposedly helps the meat come off the bone more easily when you eat it, which is what my mom says she was told by her grandma. I don’t know how true that is, but in any case the acidity also balances out some of the flavors and is a nice addition.

1 lb pork spare ribs, cut into bite-sized pieces (usually my family buys it in about 1-inch pieces, which is about half the size of what’s pictured)
1 Tbsp lemon juice
1/2 tsp fine sea salt
1/4 tsp sugar
1/4 tsp pepper
2 cloves garlic, minced
4 Tbsp lemongrass, minced (about 2 stalks)
2-3 Tbsp cooking oil (canola, vegetable, or even coconut oil, which is what I used here)
1 Tbsp honey
a few dashes of Maggi seasoning sauce or soy sauce

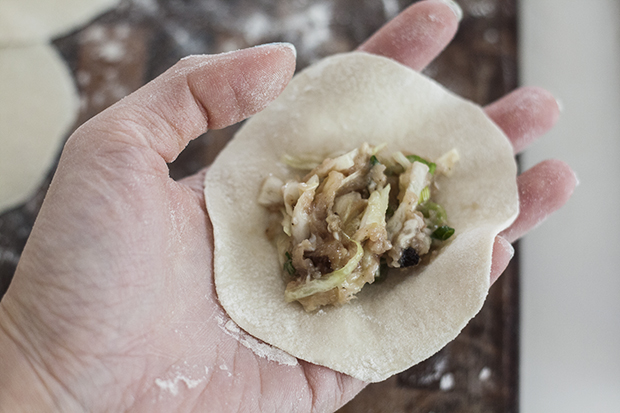
1. Rinse the ribs and pat dry with paper towels. Add the lemon juice, salt, sugar, pepper, garlic, and lemongrass to the ribs and marinate at least 1 hour and up to overnight.

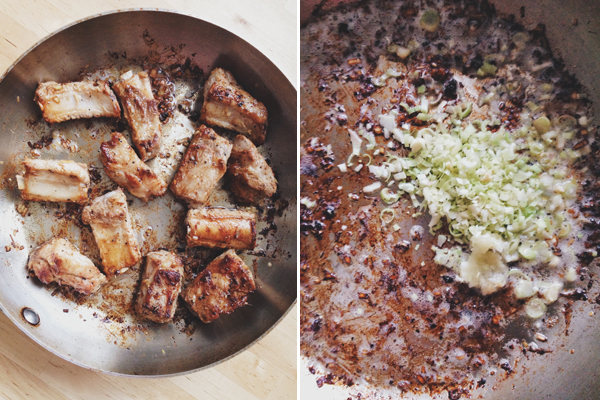
2. Heat a wok or a 12-inch skillet over medium-high heat. Add the oil. When the oil is hot, add the ribs, but try to leave out the extra stray bits of lemongrass and garlic for now (they burn easily, so we’ll add them afterward), only whatever bits are already clinging to the meat. Leave the ribs alone for a few minutes to let them brown, then stir them up and let them brown on all sides. Once the ribs are browned but not too dark, turn the heat to medium-low to let them cook through. Depending on how thick or how big the ribs are cut, you may want to cover them with a lid to make sure they cook through completely. Here, I had to cover them for about 5 minutes. When you lift the lid, if there’s liquid that’s accumulated from the steam, turn the heat back up to medium or medium-high, and cook until the liquid evaporates and the ribs have crisped up a bit, all the while stirring and watching carefully so that nothing burns. When the ribs are done, drizzle the honey over them and stir-fry for another half-minute or so to allow the honey to caramelize and coat the ribs. Remove the ribs to a plate.

3. Add the remaining bits of lemongrass and garlic from the original marinade to the pan (you can also add more oil here if the pan is too dry, to prevent the lemongrass and garlic from burning). You want the heat high enough for the lemongrass and garlic to crisp up here (if the lemongrass doesn’t crisp, it will be tough and fibrous), but not so high that they burn. Once the lemongrass and garlic are brown and crispy, add them to the ribs on the plate. As is customary in my family, add a couple dashes of Maggi over everything. Serve with rice. If desired, mix some of the charred bits of lemongrass and garlic in with your rice as you’re eating.

lemongrass ribs

Optional: If you happen to have leftover cold rice in the fridge, you can make fried rice in the same pan. Take the cooked ribs out of the skillet but leave the bits of lemongrass and garlic. Add a bit more oil to the pan, then put the cold rice in (you can crumble the rice up a bit with your fingers before adding it in). Stir-fry a few minutes, then sprinkle some water over the rice and cover with a lid for a few minutes to warm it through. Only use leftover cold rice for fried rice — freshly made rice will turn into mush.

Pork and Cabbage Dumplings (鍋貼 Guotie, 餃子 Jiaozi) for Chinese New Year: Tutorial and Recipe

Unlike many Chinese families, our family never really participated in the traditional Lunar New Year activities growing up. My parents would give me and my sister the obligatory red envelope (利市 lai see or 红包 hong bao), but that was about it. It wasn’t until I spent more time with my husband’s family that I learned more about the traditions and foods that surround the Lunar New Year. We eat symbolic foods like apples (蘋果 ping guo) that represent peace (平安 ping an), noodles — never cut — for longevity, and fish (魚 yu) for abundance (有余 you yu). (A lot of the association comes from the words sounding alike.) And of course, there are dumplings (known as 餃子 jiaozi when boiled or 鍋貼 guotie when panfried), which represent wealth and prosperity because they have the shape of gold nuggets, the ancient Chinese currency for money.

MLS_Dumplings_2

MLS_Dumplings_1

When I visited my sister in Beijing about a year and a half ago, she and I took a noodle and dumpling class from a former Beijing chef. He shared with us many tips for making perfect dumplings, which I’ll also share with you in the primer that follows below.

304774_10101745110586291_137977020_n

Take a look at these professionally folded dumplings by our teacher, after 20 + years of practice. Someday, I hope to make dumplings this beautiful!

375964_10101745110316831_1367928320_n

Back in the US, I hardly ever made my own dumpling wrappers since store-bought ones were so much more convenient. But during my two years in Grenada, I really got the chance to practice my skills at making wrappers because, like most other Asian foods, they were impossible to find on the island! If I ever wanted to eat dumplings, I knew I’d have to make them from scratch. Luckily, I wasn’t the only one in Grenada who missed them, so my friends and I would often spend afternoons making absurd quantities of dumplings together and then share the loot. It’s really the perfect group activity. Funnily enough, store-bought dumpling wrappers are not that common in Beijing either because everyone makes them from scratch!

Toward the end of my visit to Beijing, I was on the hunt for a dumpling roller to take home with me. I kinda waited until the last minute, and I didn’t have any luck at the couple of grocery stores and shops I went to. Finally, on my last morning, as I was out picking up breakfast with my sister and her family, we happened upon a vendor rolling breakfast buns with exactly the kind of dumpling roller I was searching for. Unlike the light wood ones that stores typically sell (see photo above), his was a beautiful shade of dark brown (see photo below). I asked him if dumpling rollers were available to purchase anywhere nearby, and he responded with a very definitive no. I asked him if he’d be willing to sell me his, and after much hesitation, he went on a long spiel about how he carefully selects each piece of Chinese mahogany wood for his rollers, and then crafts each of them by hand. He pulled out a second back-up roller from the back of the stall and said these were the only two he had. I finally made him an offer he couldn’t refuse, and he very nonchalantly agreed to sell me one. I ended up paying 50rmb, about $8 — which is probably much more than one would cost in a grocery store but seemed like a steal to me for something crafted by hand, made of better wood, and bearing such beautiful patina from age and use by a Beijing dumpling maker. Plus, it now came with a great story. It’s still my favorite souvenir from Beijing!

So now, let me share with you my favorite tips for making dumplings, just in time for Chinese New year. Round up your family, your children, or a group of friends for a day of dumpling-making! It’s become one of my favorite ways to spend time with new friends and people I love. I often tell my sister that I think in another life, I could be a dumpling maker. :)

MLS_Dumplings_3

MLS_Dumplings_4

Ingredient List
Adapted from Asian Dumplings by Andrea Nguyen

DOUGH
2 cups all-purpose flour
3⁄4 cup warm water

FILLING
2 cups finely chopped Napa cabbage or regular cabbage
2/3 lb ground pork or turkey (I used turkey here to make it healthier, but pork is more traditional)
1/3 cup minced Shiitake mushrooms (if using dried, soak in hot water for 20 minutes to rehydrate)
1⁄2 tsp salt
1 Tbsp grated ginger
1⁄3 cup chopped Chinese chives or scallions (Chinese chives are the traditional ingredient, but if you don’t like the flavor, you can substitute scallions)
1 egg
2 cloves garlic, minced
1⁄4 tsp black pepper
1 1⁄2 Tbsp soy sauce
1/2 Tbsp oil
1 1⁄2 Tbsp sesame oil
1 Tbsp rice wine

DIPPING SAUCE
1/3 cup soy sauce
2 1⁄2 Tbsp rice vinegar
(or 1 Tbsp white vinegar + 1 Tbsp water + 1⁄4 Tbsp sugar)
2 tsp minced garlic
chili oil (optional)

Process

MAKING THE DOUGH
People who make dumplings regularly, like the chef we took our class from or even my sister’s ayi (nanny) in Beijing, rarely use recipes for this dough. They gauge the proportions of water to flour by the feel of the dough and adjust accordingly. The dough can feel very different depending on the humidity of your environment, the amount and type of flour used, and even the amount and temperature of the water. So take all these factors into consideration when trying your hand at dumpling dough. In the end, it all just comes down to practice. 

MLS_Dumplings_5_MG_2223 copy
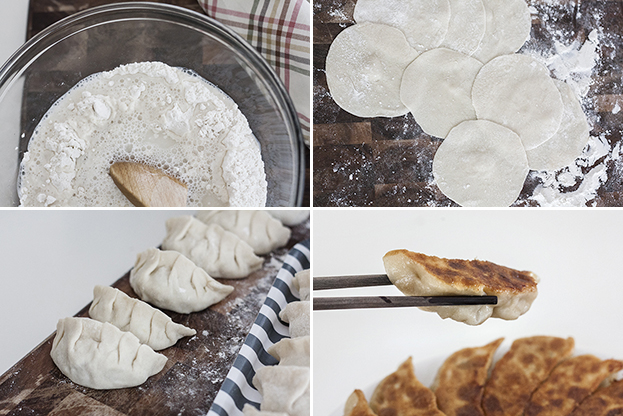
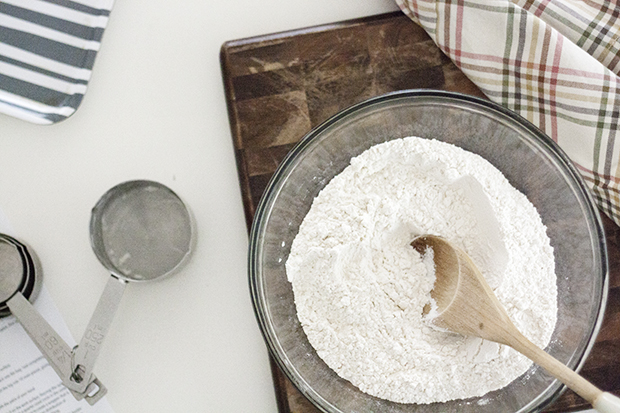
1. Put the flour in a bowl and make a well in the center. Pour the water in and stir (either with your hand or with a spoon), evenly moistening the flour. Gently mix until all the lumpy bits have been incorporated. Add more flour or water as necessary. The dough should start looking shaggy and hold its shape when pinched, but it shouldn’t be too moist.

_MG_2232 copy

2. Transfer the dough to a lightly floured surface and knead the dough with the heel of your hand for about 2 minutes. The dough should be nearly smooth and somewhat elastic. Press down on the dough; the impression should slowly bounce back.

_MG_2226 copy
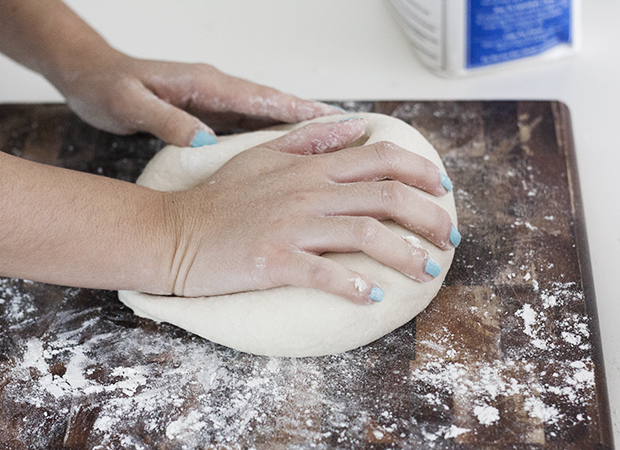
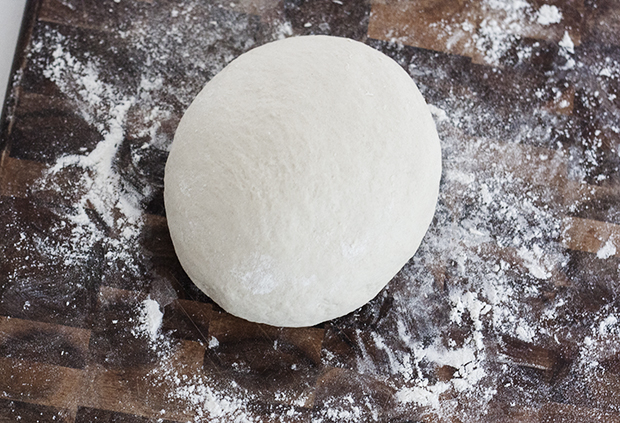
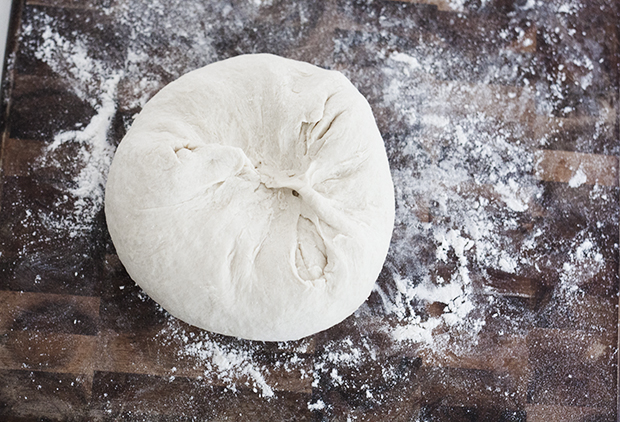
3. Smooth out the top of the dough and pinch the ends together on the bottom. Place the dough in a Ziplock bag and let it rest (alternatively, you can put it in a bowl and cover with a plate).

PREPARING THE FILLING
While the dough is resting, use this time to prepare your ingredients for the filling. Filling can be made ahead and refrigerated overnight. Letting it sit for a few hours or overnight can help bring out the flavors, but it’s not absolutely necessary if you’re short on time. There are all sorts of fillings you can put inside a dumpling, but here I have stuck with some of the classic ingredients.

4. Combine all the filling ingredients in a large mixing bowl. Add seasonings and mix well. Use your hands!

_MG_2250 copy

FORMING THE DUMPLING WRAPPERS
This might just be my favorite part of making dumplings! It is so much fun, and I love the challenge of trying to make the perfectly round and thin wrapper. 

_MG_2227 copy

5. Remove the dough from the bag and place on a floured surface.

6. Cut the dough into thirds and put two of the thirds back into the bag. Seal completely.

_MG_2261 copy_MG_2264 copy
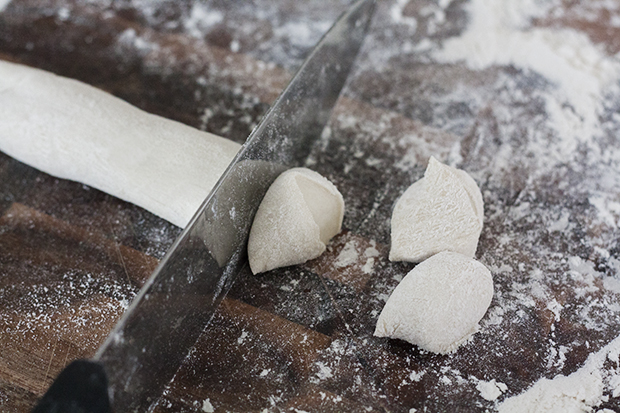
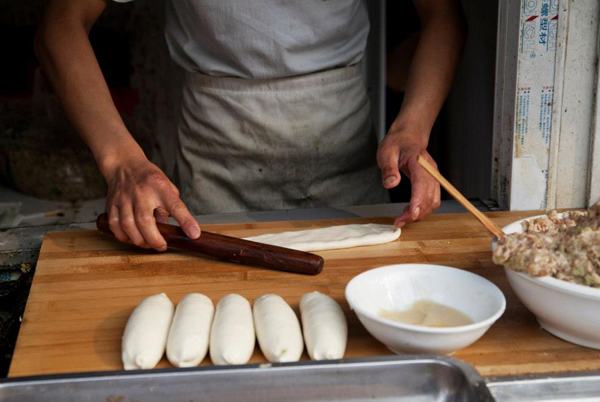
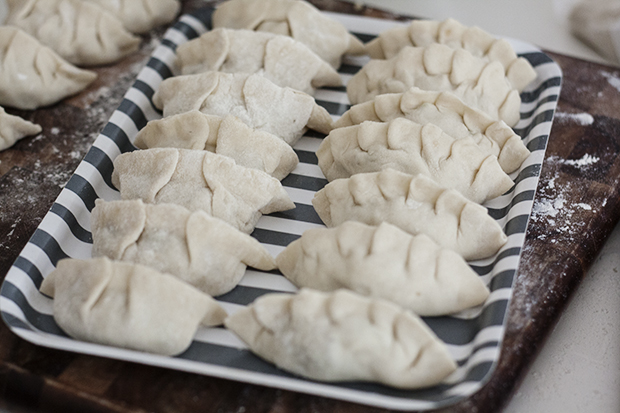
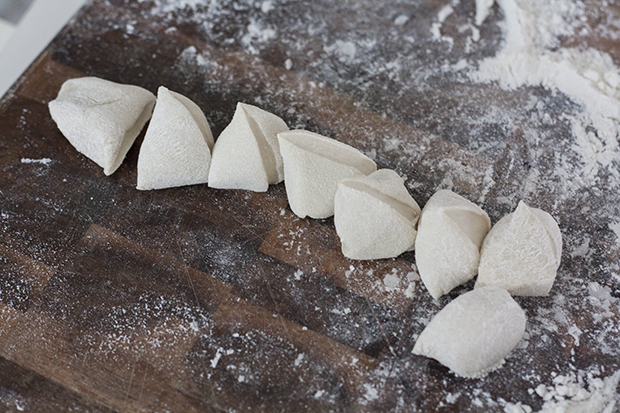
7. Roll the remaining third of the dough into a 1-inch thick log. Cut the log into even pieces, about 3/4 ” thick each. (If the ends of the log are thinner, make those cuts a bit longer, about 1″ thick.) Now here is the trick I learned in the dumpling class: After each cut, rotate the log a quarter turn, so that the dough pieces are pinched in different directions on each side (see photo above). As you’ll soon see, this is an important step in forming perfectly circular dumpling wrappers!

_MG_2267 copy

8. Roll the pieces lightly in flour and then set each piece on one of its cut ends. Flatten each piece of dough with the palm of your hand. Because of the quarter turn when cutting, the dough will naturally flatten into the shape of a circle. How brilliant, right? :) Without the turn, you’d get more of an oval shape, due to the way the knife pinches the dough flat. Then, if you take as much delight in this process as I do, you can simply reshape any pieces that don’t look as perfectly round as they should. :)

_MG_2268 copy

9. To roll the wrappers, start with a lightly floured surface. If you’re right-handed like me, hold one of the flattened pieces of dough in your left hand and the wooden rolling pin in your right. You’ll want to roll the rolling pin gently back and forth, while turning the dough in a counter-clockwise motion in your left hand. Roll up about 1/2″ – 1″ in from the edge, avoiding the center of the dough completely. This way, you’ll leave the center a little thicker — perfect for holding the heavy filling — while making the edges a little thinner — perfect for making delicate pleats to seal the top. After the dumplings are folded and the outer edges pressed together, the thicker center will have about the same amount of doughiness as the outer pleated edges. I love how perfectly this all works out. :)

Dumpling

_MG_2287 copy

10. Continue rolling until you have about 10 wrappers to work with. You don’t want to roll too many at a time, or else they will start to dry out (unless you have a partner to fill the dumplings while you roll!).

_MG_2292 copy

11. Fill your wrappers with about 1 tablespoon of filling. Flatten the filling a bit in the center. Fold using your favorite method! The Beijing method for boiled dumplings is very easy and involves simply folding the wrapper over, and then pinching it shut by holding the edges between thumbs and index fingers of both hands. Andrea Nguyen also has some fantastic videos on basic dumpling folds here and here (I tend to use the method in the second video).

_MG_2297 copy

At this point, your dumplings are ready to be fried, boiled, steamed, or frozen. I like to make a huge batch of dumplings and freeze them for later use. Be sure to put them on a nonstick tray (lined with freezer paper, or a Silpat mat works well) and space them out individually in the freezer; otherwise they will stick together and be impossible to separate once defrosted. After 30 minutes or more, the dumplings are frozen enough that you can place them all into a Ziploc bag for quick and easy meals. Frozen dumplings do not need to be defrosted before cooking — just add a few minutes of extra cooking time to each of the three methods below.

COOKING THE DUMPLINGS: 3 ways to cook fresh or frozen dumplings

My favorite go-to method for cooking dumplings is in a frying pan. I love the crispy bottoms and tender, steamed tops. Here’s how to get perfectly cooked dumplings every time:

Panfry
_MG_2336 copy
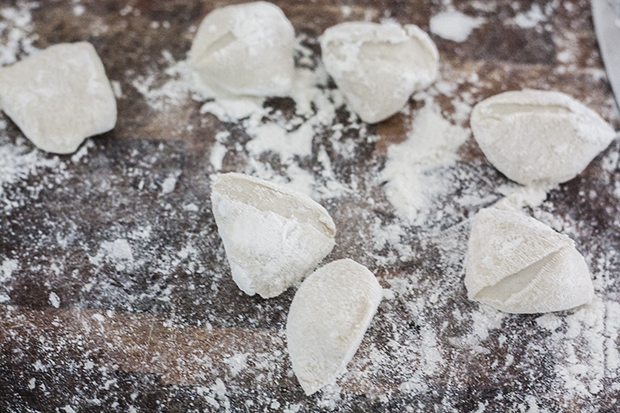
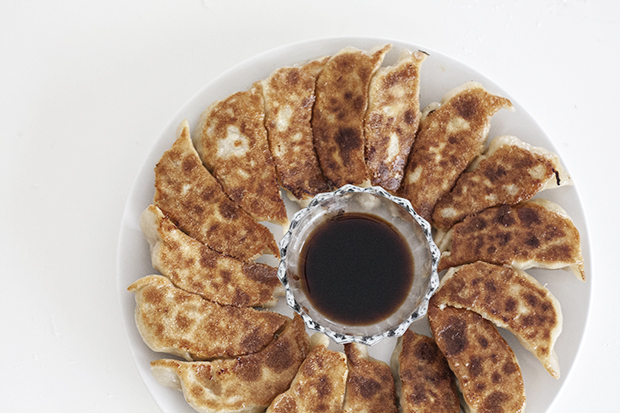
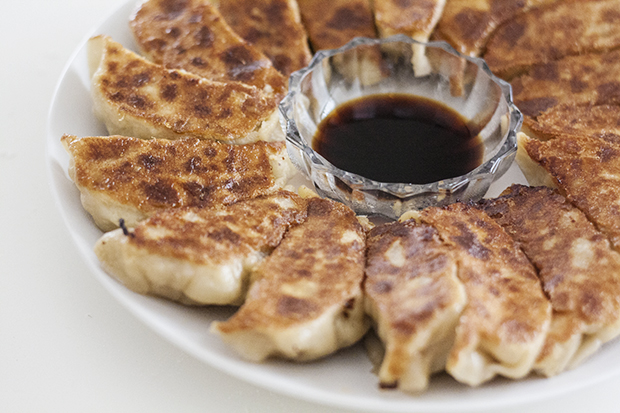
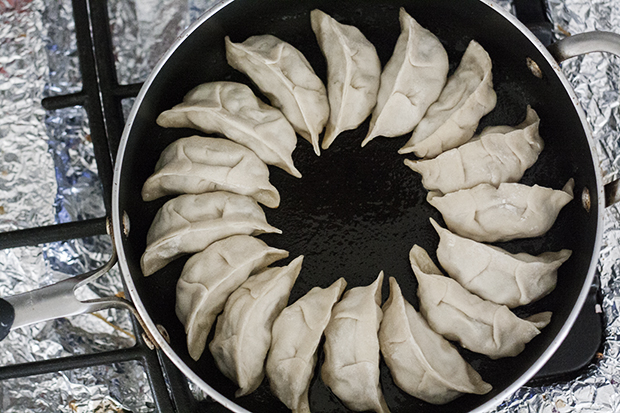
1. Heat up 1-2 tablespoons of vegetable oil in a non-stick pan on medium-high heat. When the pan is hot, add in the dumplings in a single layer. Arrange them in a circular shape, allowing them to hug one another. Leave about 1/8″ between each dumpling because they will plump up.
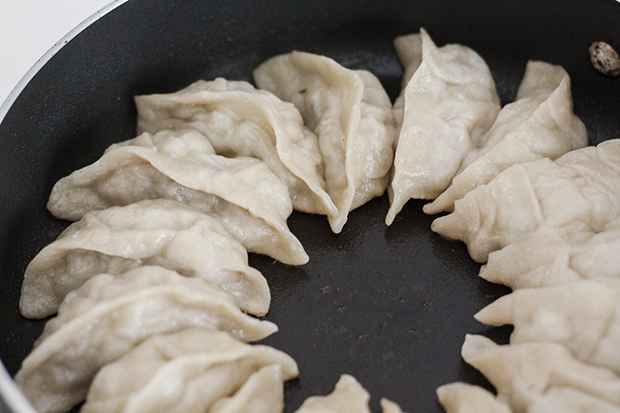
2. Let the dumplings fry until the bottoms are golden brown.

3. Add in about 1/3 cup water (until there is about 1/4” of water in the pan) and cover with a lid. Let them steam for about 5-7 minutes, until you hear the dumplings begin to sizzle after all the water has evaporated.

_MG_2345 copy

4. Remove the lid. The dumplings should look translucent at this point. Fry just a little bit longer, until the bottoms are crispy again.

_MG_2348 copy

5. For a nice presentation, find a plate just slightly smaller than your frying pan. First flip the plate onto the dumplings in the pan, and then invert the pan of dumplings onto the plate.

_MG_2380 copy

6. Serve immediately with dipping sauce. Enjoy!

Boil
Place dumplings into boiling water. When the dumplings begin to float, cook for an additional 5-6 minutes. Remove carefully with a slotted spoon. I tend to think this is best served in soup. In Beijing, though, they’re just eaten as is dipped in some vinegar. Traditional Beijingers even drink the flour water that the dumplings were boiled in!

Steam
Bring 3 cups of water to a boil in a large wok. Place dumplings into a bamboo steamer basket and place into the wok. Steam for 8 minutes. Serve immediately.

_MG_2391 copy

_MG_2360 copy

_MG_2382 copy

Vietnamese Green Papaya Salad with Shrimp and Pork Belly (Goi Du Du)

_MG_0883 copy

This green papaya salad is a great warm-weather dish with its crunchy, cool papaya, plenty of fresh herbs, shrimp, and pork. In fact, the first time I had this dish was at a quiet, riverside hut with my cousin in Vietnam. We were at a daytime retreat center just about a half hour outside of the city. Each hut came with a beautiful view, a table, chairs, and the best part, hammocks! They had a full menu, so you could order everything from an entire hotpot meal to fresh coconut waters. We picked a few things off the menu and spent the day lounging and relaxing by the water. All the makings of a perfect, lazy summer afternoon.

IMG_4616 copy IMG_3983 copy IMG_3995 copy

My mom and I set out to recreate this simple dish back at her home in Portland, Oregon. It doesn’t require any fancy ingredients, so it was a cinch to put together. The only thing you may need to hunt down is a green papaya. These should be available at any Southeast Asian supermarket or even at a Chinese grocery store. While you’re there, be sure to pick up some shrimp chips too. I prefer the long, rectangular ones that my mom brings back for me from Vietnam (for maximum load), but you can use the little, round ones that are available at any Asian grocery store too.

_MG_0884 copyVietnamese Green Papaya Salad with Shrimp and Pork Belly
Serves 6-8 as an appetizer, 4 as a light meal

1 large green papaya, shredded (about 6-8 cups)
1 bunch thai basil
1 bunch mint leaves
1/2 bunch cilantro
1 /2 lb. medium or large shrimp
1/2 lb. pork belly
nuoc cham dressing
crushed peanuts
fried shallots
shrimp chips

1. Wash and peel the papaya with a vegetable peeler. Cut in half and remove the seeds inside. Julienne the papaya with a knife, or use a mandoline or julienne peeler to get thin strips. I find that the julienne peeler is the best tool for this job since it is quick, easy, and produces the perfect thin-yet–still-wide-enough-to-be-crunchy papaya strips.

2. Boil the shrimp for a minute or two until just cooked.  After the shrimp have cooled, lay them flat and slice through them horizontally (butterfly them). This should produce two pieces of shrimp that make for a more attractive salad and an easier bite to eat!

3. Steam the pork belly in a small pot with about 1/2″ inch of water or in a steamer until just cooked. Let it cool and then slice thinly.

4. Wash and dry the thai basil, mint, and cilantro. Next, you’re going to chiffonade all the herbs by picking off all the leaves, stacking them, rolling them up, and slicing into thin strips.

5. Time to fry those shrimp chips! See directions here for frying.

6. Finally, assemble the papaya, herbs, shrimp, and pork together. You can either mix them up or layer them like I did for a more attractive presentation. Sprinkle the crushed peanuts and fried shallots (I forgot them in these pics) on top and serve with nuoc cham dressing. You can always dress the salad and mix it all up for your guests, but you’ll have to finish the whole salad in one sitting. If you think you’ll have leftovers, I’d suggest serving the dressing on the side.

_MG_0905 copy

pumpkin soup with salted pork

There’s a certain section of all the grocery stores here in Grenada that has a particularly pungent smell. If you follow the scent, it’ll lead you to a back corner where you’ll find an assortment of salted meats – salted fish, salted pig snouts, and different varieties of salted pork. My sister and I have always had a love and fascination for cured meats, whether it’s prosciutto from Italy, nem from Vietnam, or iberico from Spain. So when I stumbled upon some salted pork in Grenada, I knew I had to try it.

Granted, it definitely didn’t look like the kind you’d snack on with a glass of wine or with some cheese. But I was certain that it’d impart some yummy flavors to any dish that it was part of. So I threw a pack of salted pork riblets into my cart and continued on to the produce aisle. As I continued my shopping, a store clerk started chatting with me and asked me what I was making with my salted pork. I confessed, I didn’t yet know. He suggested a pumpkin soup and proceeded to give me step by step instructions on how to prepare the pork, which was confirmed by an elderly lady passing by — who, I might add, preceded her comments with “Let me tell you how to make it. I am a woman.” :)

So I came home with the pumpkin and salted pork in hand and looked through a few more recipes online. I ended up combining their suggestions with a recipe that I adapted from Hank Shaw’s recipe here. The key differences include the use of pumpkin rather than butternut squash, and substituting salt pork for bacon.

Pumpkin Soup with Salted Pork
Serves 4–6

I had some chicken stock left over that I had made previously with a whole chicken and some fresh thyme thrown in. The thyme adds an extra layer of complexity to the soup, so if you’d like some in your soup as well, you can feel free to throw in some fresh thyme or other fresh herbs as well.

If you’re not able to find salted pork, you can always salt your own. Any cut of pork will do, but riblets are a favorite because they have a bit of fat that flavors the soup and they’re fun to nibble on later. You can go hardcore and make “real” salt pork (takes two weeks) or just cover a piece of pork with salt and throw it in the fridge overnight. If you do the latter, you can probably get by with just rinsing the salt off. Don’t boil it before you add it into the soup or it’ll lose all its flavors and saltiness.

The traditional West Indian version of this soup sometimes includes chopped cabbage leaves. Alternatively, you can also leave out the pork riblets and season the soup with cloves, nutmeg, and some cinnamon. Chilled, this would make a refreshing soup for a summer day! This version is more heavy and substantial, which I find works nicely as a full meal with some crusty bread.

3 lbs West Indian pumpkin (also called Calabaza, but feel free to substitute with butternut squash)
3/4 lb salted pork riblets
2 small onions, diced
4 cloves garlic, minced
5 bay leaves
1 1/2 quarts chicken stock
2 Tbsp oil

1. Rinse pork riblets to wash off all the extra salt.

2. Put some water in a small pot and bring to a boil. Put the pork riblets into the water and let it boil for about 5 minutes.

3. Discard the water, rinse pork riblets, and repeat one more time. Set pork aside.

4. In a large stock pot, sautee the garlic and onions in oil over medium-high heat.

5. When the garlic and onions have browned, add in the chicken stock, pumpkin, bay leaves, and pork. Bring the mixture a boil and reduce heat to let it simmer softly. Simmer for at least an hour or until the pumpkin has broken down.

6. Remove pork riblets and bay leaves. Puree the soup.

7. Garnish with fresh herbs and a swirl of heavy cream or coconut milk.

Enjoy!