2 articles Articles posted in holiday

Pork and Cabbage Dumplings (鍋貼 Guotie, 餃子 Jiaozi) for Chinese New Year: Tutorial and Recipe

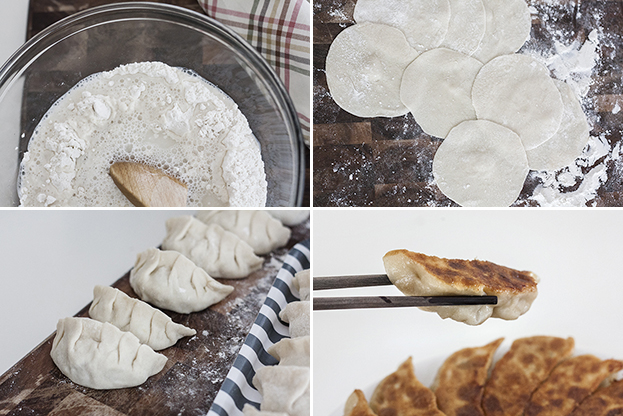
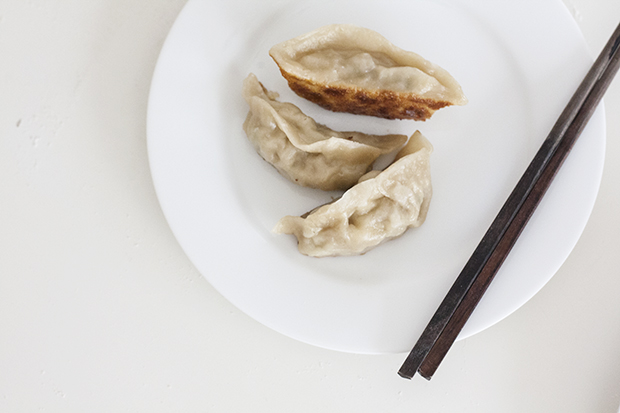
Unlike many Chinese families, our family never really participated in the traditional Lunar New Year activities growing up. My parents would give me and my sister the obligatory red envelope (利市 lai see or 红包 hong bao), but that was about it. It wasn’t until I spent more time with my husband’s family that I learned more about the traditions and foods that surround the Lunar New Year. We eat symbolic foods like apples (蘋果 ping guo) that represent peace (平安 ping an), noodles — never cut — for longevity, and fish (魚 yu) for abundance (有余 you yu). (A lot of the association comes from the words sounding alike.) And of course, there are dumplings (known as 餃子 jiaozi when boiled or 鍋貼 guotie when panfried), which represent wealth and prosperity because they have the shape of gold nuggets, the ancient Chinese currency for money.

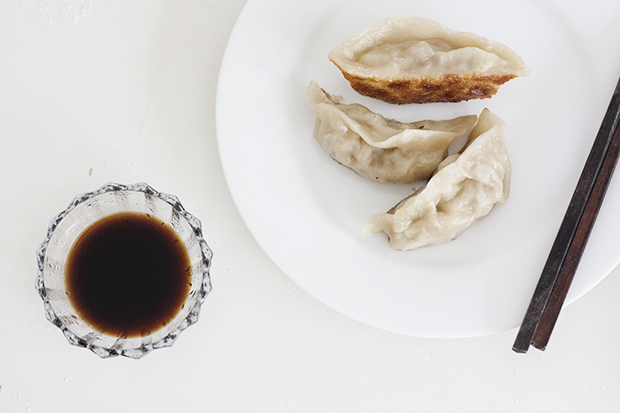
MLS_Dumplings_2

MLS_Dumplings_1

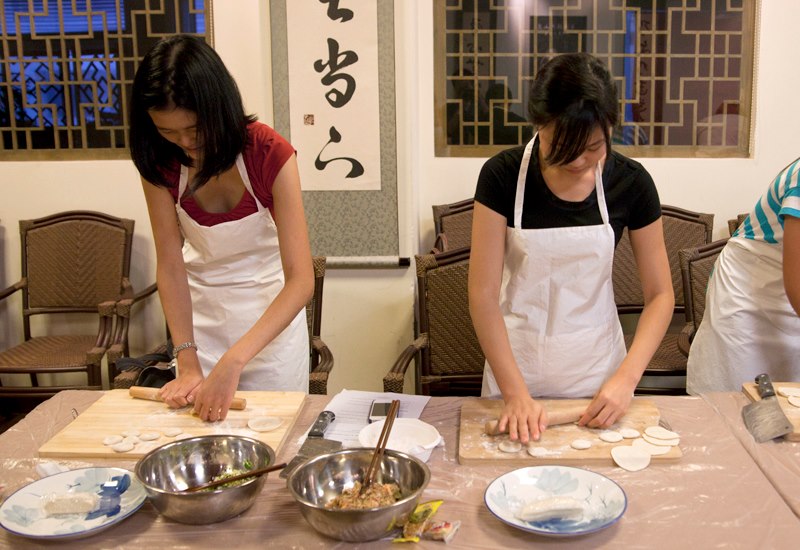
When I visited my sister in Beijing about a year and a half ago, she and I took a noodle and dumpling class from a former Beijing chef. He shared with us many tips for making perfect dumplings, which I’ll also share with you in the primer that follows below.
304774_10101745110586291_137977020_n

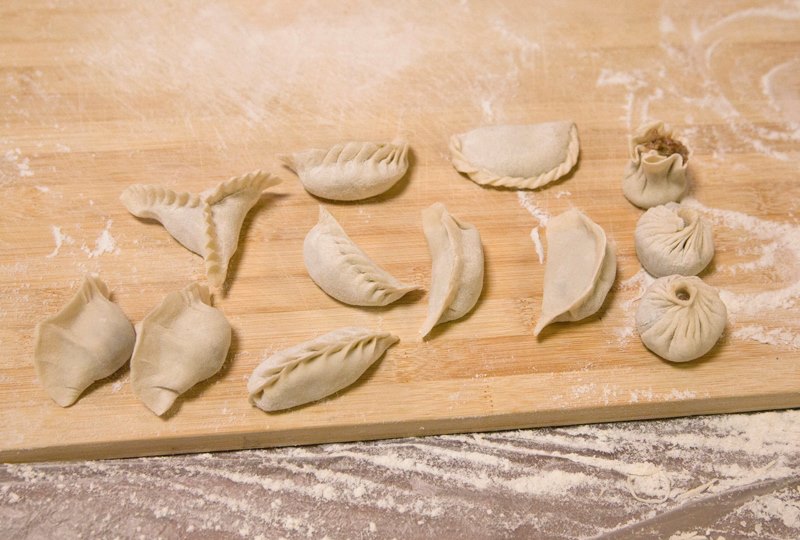
Take a look at these professionally folded dumplings by our teacher, after 20 + years of practice. Someday, I hope to make dumplings this beautiful!

375964_10101745110316831_1367928320_n

Back in the US, I hardly ever made my own dumpling wrappers since store-bought ones were so much more convenient. But during my two years in Grenada, I really got the chance to practice my skills at making wrappers because, like most other Asian foods, they were impossible to find on the island! If I ever wanted to eat dumplings, I knew I’d have to make them from scratch. Luckily, I wasn’t the only one in Grenada who missed them, so my friends and I would often spend afternoons making absurd quantities of dumplings together and then share the loot. It’s really the perfect group activity. Funnily enough, store-bought dumpling wrappers are not that common in Beijing either because everyone makes them from scratch!

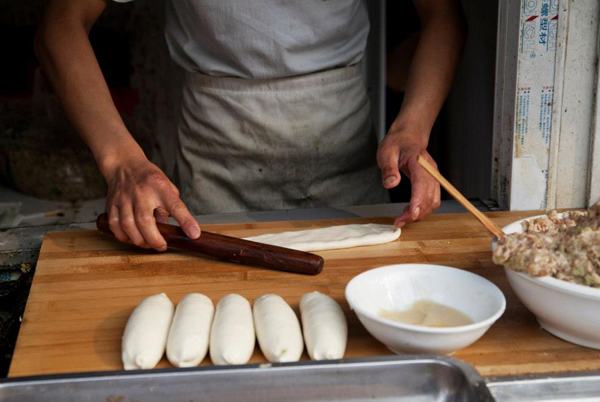
Toward the end of my visit to Beijing, I was on the hunt for a dumpling roller to take home with me. I kinda waited until the last minute, and I didn’t have any luck at the couple of grocery stores and shops I went to. Finally, on my last morning, as I was out picking up breakfast with my sister and her family, we happened upon a vendor rolling breakfast buns with exactly the kind of dumpling roller I was searching for. Unlike the light wood ones that stores typically sell (see photo above), his was a beautiful shade of dark brown (see photo below). I asked him if dumpling rollers were available to purchase anywhere nearby, and he responded with a very definitive no. I asked him if he’d be willing to sell me his, and after much hesitation, he went on a long spiel about how he carefully selects each piece of Chinese mahogany wood for his rollers, and then crafts each of them by hand. He pulled out a second back-up roller from the back of the stall and said these were the only two he had. I finally made him an offer he couldn’t refuse, and he very nonchalantly agreed to sell me one. I ended up paying 50rmb, about $8 — which is probably much more than one would cost in a grocery store but seemed like a steal to me for something crafted by hand, made of better wood, and bearing such beautiful patina from age and use by a Beijing dumpling maker. Plus, it now came with a great story. It’s still my favorite souvenir from Beijing!

So now, let me share with you my favorite tips for making dumplings, just in time for Chinese New year. Round up your family, your children, or a group of friends for a day of dumpling-making! It’s become one of my favorite ways to spend time with new friends and people I love. I often tell my sister that I think in another life, I could be a dumpling maker. :)
MLS_Dumplings_3

MLS_Dumplings_4

Ingredient List
Adapted from Asian Dumplings by Andrea Nguyen

DOUGH
2 cups all-purpose flour
3⁄4 cup warm water

FILLING
2 cups finely chopped Napa cabbage or regular cabbage
2/3 lb ground pork or turkey (I used turkey here to make it healthier, but pork is more traditional)
1/3 cup minced Shiitake mushrooms (if using dried, soak in hot water for 20 minutes to rehydrate)
1⁄2 tsp salt
1 Tbsp grated ginger
1⁄3 cup chopped Chinese chives or scallions (Chinese chives are the traditional ingredient, but if you don’t like the flavor, you can substitute scallions)
1 egg
2 cloves garlic, minced
1⁄4 tsp black pepper
1 1⁄2 Tbsp soy sauce
1/2 Tbsp oil
1 1⁄2 Tbsp sesame oil
1 Tbsp rice wine

DIPPING SAUCE
1/3 cup soy sauce
2 1⁄2 Tbsp rice vinegar
(or 1 Tbsp white vinegar + 1 Tbsp water + 1⁄4 Tbsp sugar)
2 tsp minced garlic
chili oil (optional)

Process

MAKING THE DOUGH
People who make dumplings regularly, like the chef we took our class from or even my sister’s ayi (nanny) in Beijing, rarely use recipes for this dough. They gauge the proportions of water to flour by the feel of the dough and adjust accordingly. The dough can feel very different depending on the humidity of your environment, the amount and type of flour used, and even the amount and temperature of the water. So take all these factors into consideration when trying your hand at dumpling dough. In the end, it all just comes down to practice. 

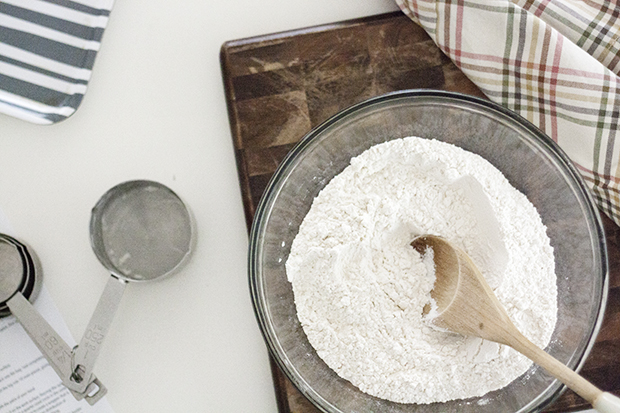
MLS_Dumplings_5_MG_2223 copy1. Put the flour in a bowl and make a well in the center. Pour the water in and stir (either with your hand or with a spoon), evenly moistening the flour. Gently mix until all the lumpy bits have been incorporated. Add more flour or water as necessary. The dough should start looking shaggy and hold its shape when pinched, but it shouldn’t be too moist.
_MG_2232 copy

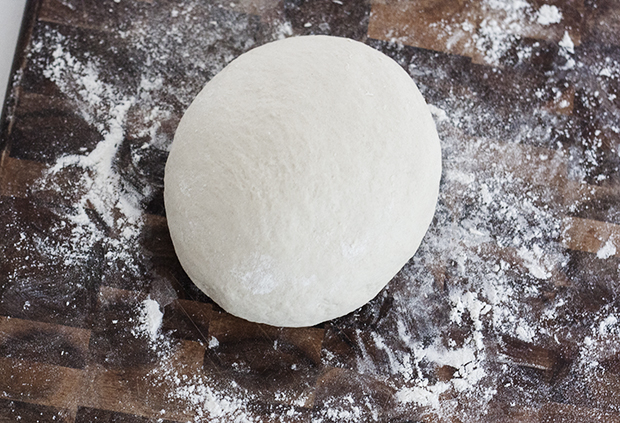
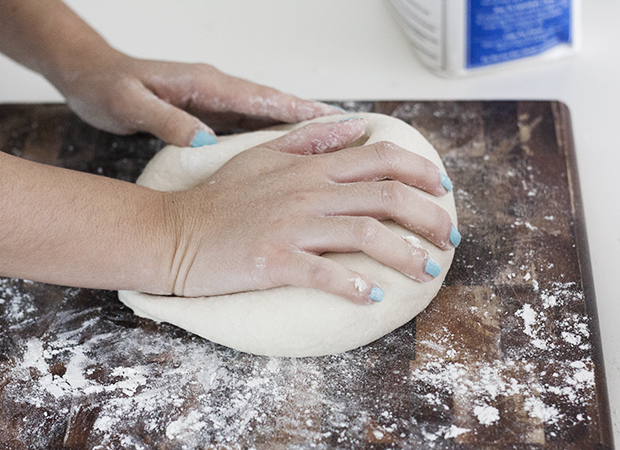
2. Transfer the dough to a lightly floured surface and knead the dough with the heel of your hand for about 2 minutes. The dough should be nearly smooth and somewhat elastic. Press down on the dough; the impression should slowly bounce back.
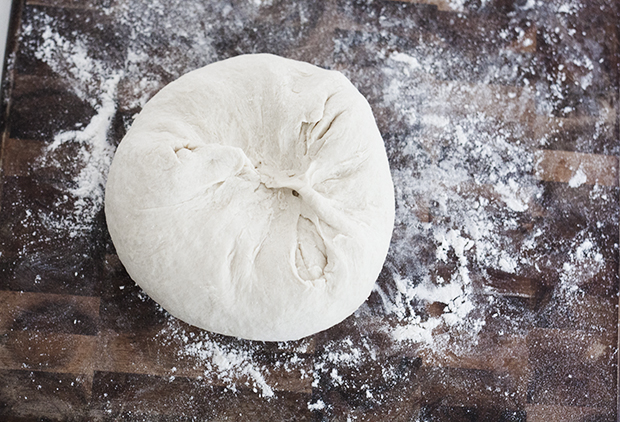
_MG_2226 copy3. Smooth out the top of the dough and pinch the ends together on the bottom. Place the dough in a Ziplock bag and let it rest (alternatively, you can put it in a bowl and cover with a plate).

PREPARING THE FILLING
While the dough is resting, use this time to prepare your ingredients for the filling. Filling can be made ahead and refrigerated overnight. Letting it sit for a few hours or overnight can help bring out the flavors, but it’s not absolutely necessary if you’re short on time. There are all sorts of fillings you can put inside a dumpling, but here I have stuck with some of the classic ingredients.

4. Combine all the filling ingredients in a large mixing bowl. Add seasonings and mix well. Use your hands!

_MG_2250 copy

FORMING THE DUMPLING WRAPPERS
This might just be my favorite part of making dumplings! It is so much fun, and I love the challenge of trying to make the perfectly round and thin wrapper. 

_MG_2227 copy

5. Remove the dough from the bag and place on a floured surface.

6. Cut the dough into thirds and put two of the thirds back into the bag. Seal completely.
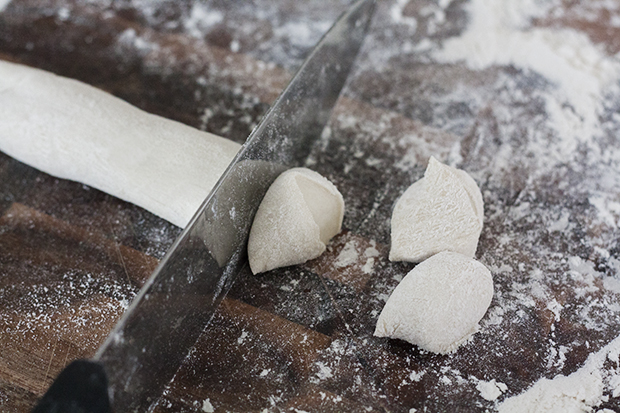
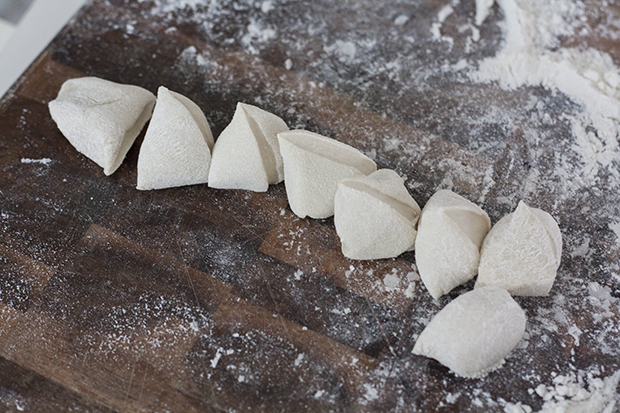
_MG_2261 copy_MG_2264 copy7. Roll the remaining third of the dough into a 1-inch thick log. Cut the log into even pieces, about 3/4 ” thick each. (If the ends of the log are thinner, make those cuts a bit longer, about 1″ thick.) Now here is the trick I learned in the dumpling class: After each cut, rotate the log a quarter turn, so that the dough pieces are pinched in different directions on each side (see photo above). As you’ll soon see, this is an important step in forming perfectly circular dumpling wrappers!
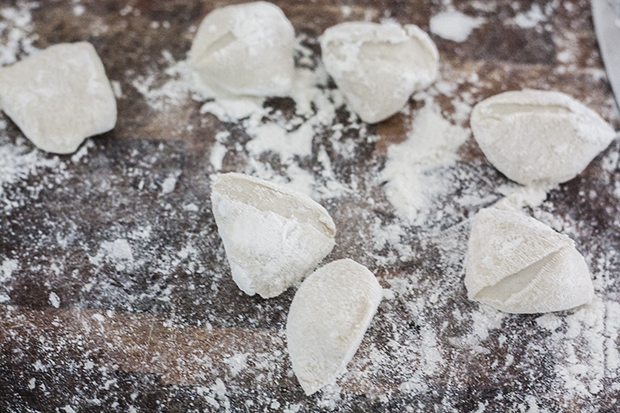
_MG_2267 copy

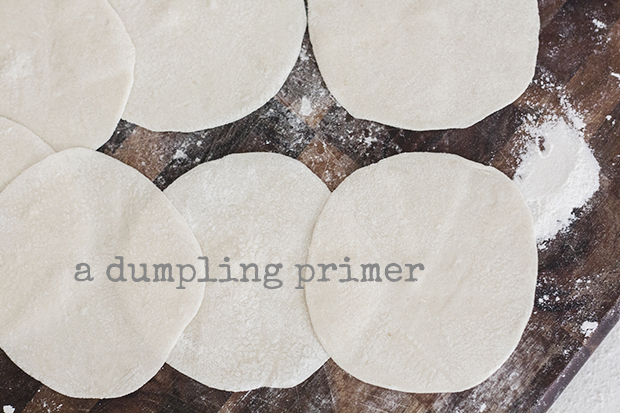
8. Roll the pieces lightly in flour and then set each piece on one of its cut ends. Flatten each piece of dough with the palm of your hand. Because of the quarter turn when cutting, the dough will naturally flatten into the shape of a circle. How brilliant, right? :) Without the turn, you’d get more of an oval shape, due to the way the knife pinches the dough flat. Then, if you take as much delight in this process as I do, you can simply reshape any pieces that don’t look as perfectly round as they should. :)
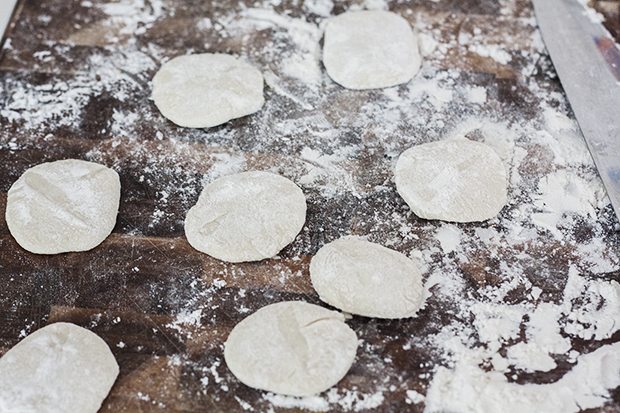
_MG_2268 copy

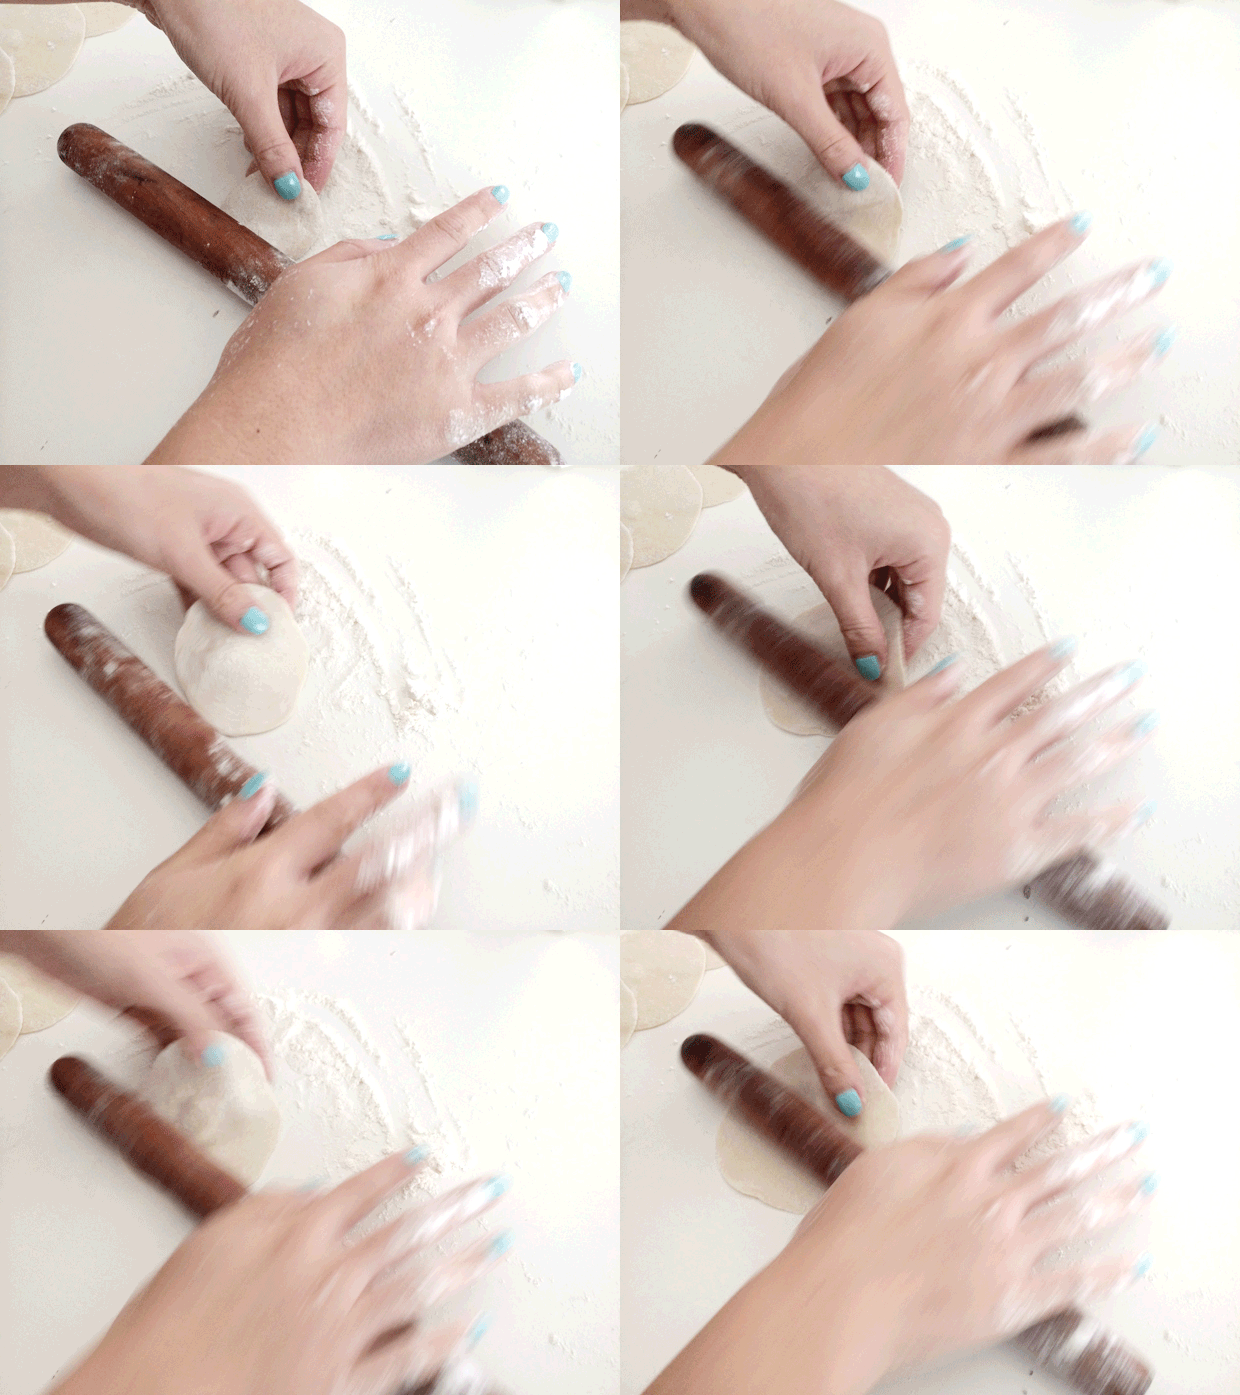
9. To roll the wrappers, start with a lightly floured surface. If you’re right-handed like me, hold one of the flattened pieces of dough in your left hand and the wooden rolling pin in your right. You’ll want to roll the rolling pin gently back and forth, while turning the dough in a counter-clockwise motion in your left hand. Roll up about 1/2″ – 1″ in from the edge, avoiding the center of the dough completely. This way, you’ll leave the center a little thicker — perfect for holding the heavy filling — while making the edges a little thinner — perfect for making delicate pleats to seal the top. After the dumplings are folded and the outer edges pressed together, the thicker center will have about the same amount of doughiness as the outer pleated edges. I love how perfectly this all works out. :)
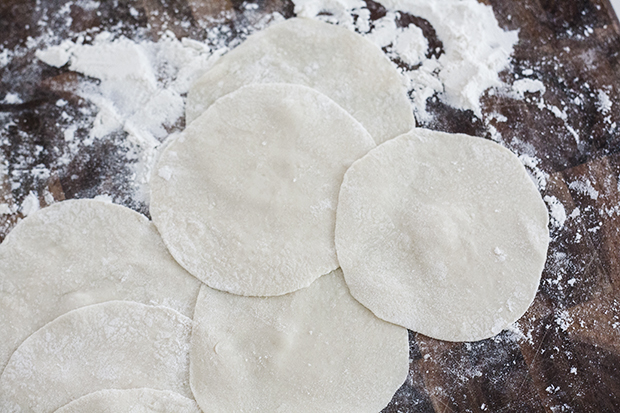
Dumpling

_MG_2287 copy

10. Continue rolling until you have about 10 wrappers to work with. You don’t want to roll too many at a time, or else they will start to dry out (unless you have a partner to fill the dumplings while you roll!).

_MG_2292 copy

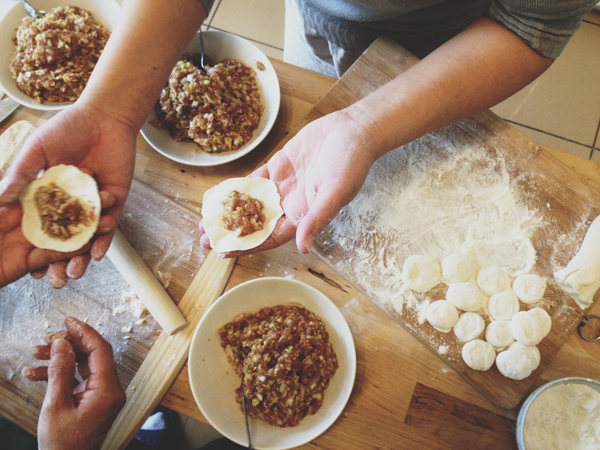
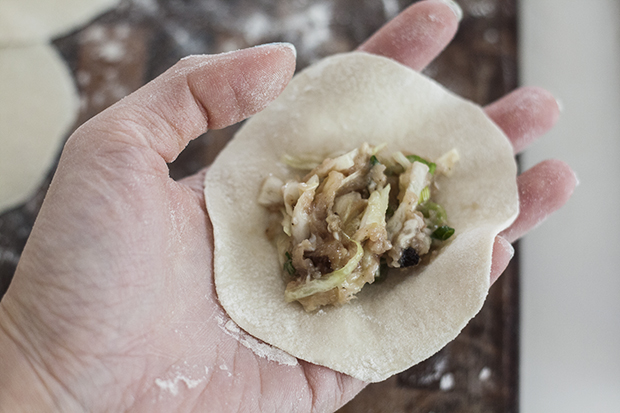
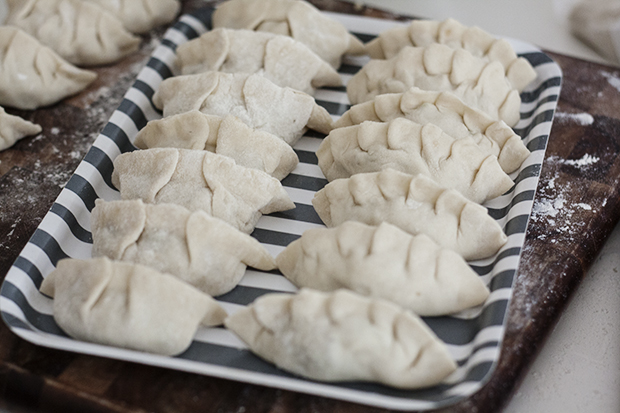
11. Fill your wrappers with about 1 tablespoon of filling. Flatten the filling a bit in the center. Fold using your favorite method! The Beijing method for boiled dumplings is very easy and involves simply folding the wrapper over, and then pinching it shut by holding the edges between thumbs and index fingers of both hands. Andrea Nguyen also has some fantastic videos on basic dumpling folds here and here (I tend to use the method in the second video).
_MG_2297 copy

At this point, your dumplings are ready to be fried, boiled, steamed, or frozen. I like to make a huge batch of dumplings and freeze them for later use. Be sure to put them on a nonstick tray (lined with freezer paper, or a Silpat mat works well) and space them out individually in the freezer; otherwise they will stick together and be impossible to separate once defrosted. After 30 minutes or more, the dumplings are frozen enough that you can place them all into a Ziploc bag for quick and easy meals. Frozen dumplings do not need to be defrosted before cooking — just add a few minutes of extra cooking time to each of the three methods below.

COOKING THE DUMPLINGS: 3 ways to cook fresh or frozen dumplings

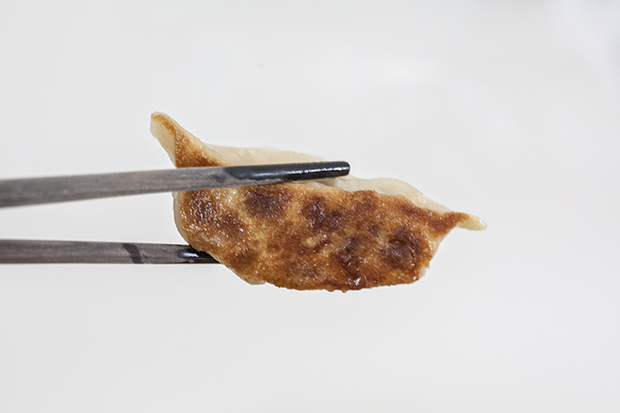
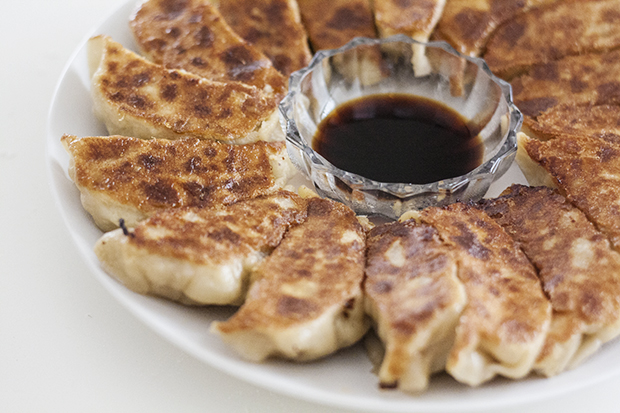
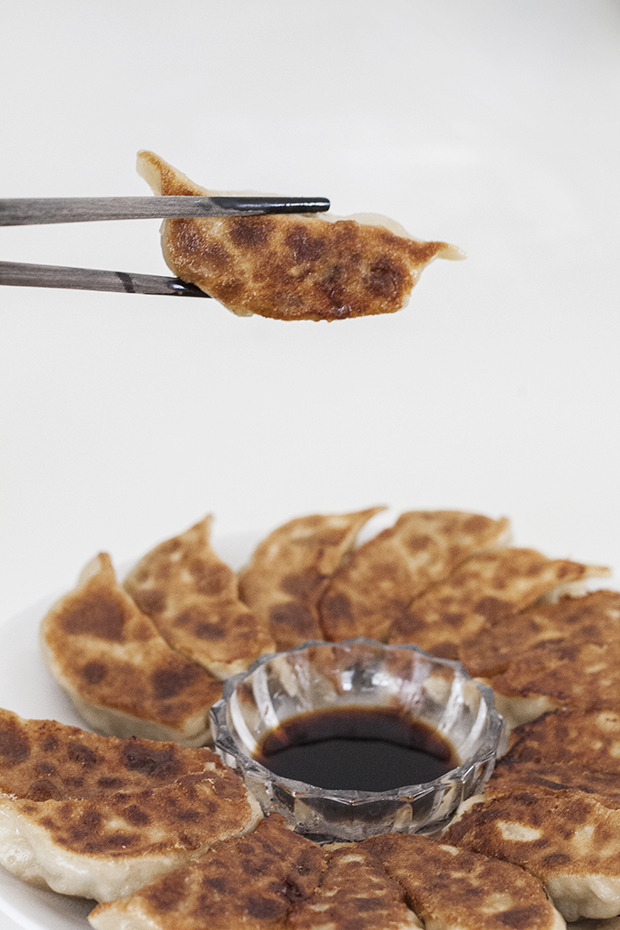
My favorite go-to method for cooking dumplings is in a frying pan. I love the crispy bottoms and tender, steamed tops. Here’s how to get perfectly cooked dumplings every time:

Panfry
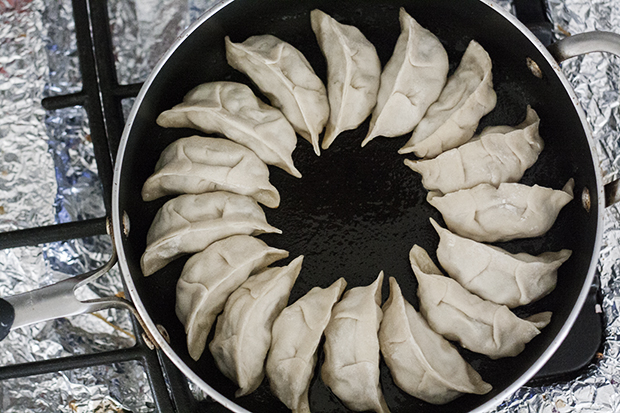
_MG_2336 copy1. Heat up 1-2 tablespoons of vegetable oil in a non-stick pan on medium-high heat. When the pan is hot, add in the dumplings in a single layer. Arrange them in a circular shape, allowing them to hug one another. Leave about 1/8″ between each dumpling because they will plump up.

2. Let the dumplings fry until the bottoms are golden brown.

3. Add in about 1/3 cup water (until there is about 1/4” of water in the pan) and cover with a lid. Let them steam for about 5-7 minutes, until you hear the dumplings begin to sizzle after all the water has evaporated.
_MG_2345 copy

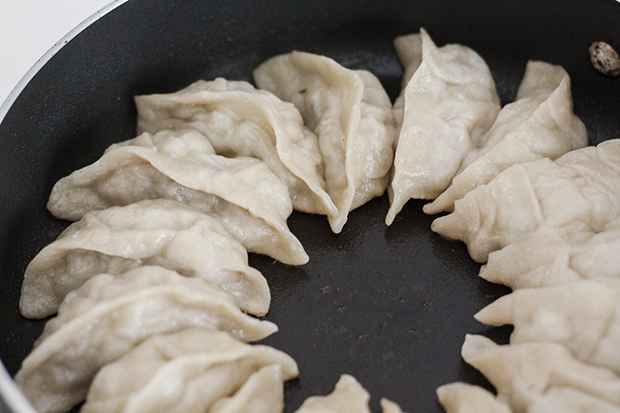
4. Remove the lid. The dumplings should look translucent at this point. Fry just a little bit longer, until the bottoms are crispy again.
_MG_2348 copy

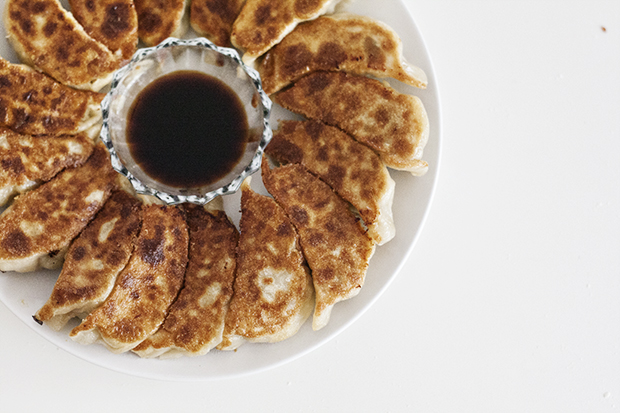
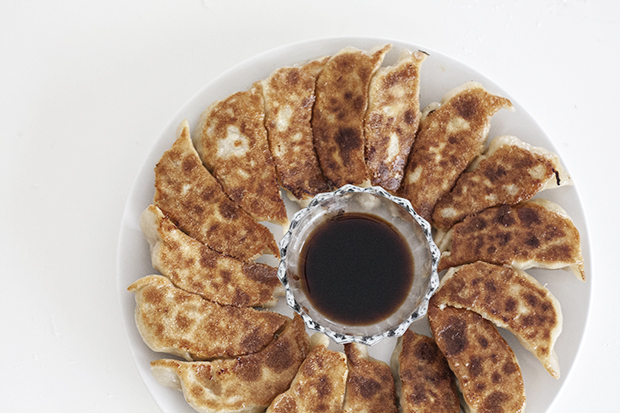
5. For a nice presentation, find a plate just slightly smaller than your frying pan. First flip the plate onto the dumplings in the pan, and then invert the pan of dumplings onto the plate.

_MG_2380 copy

6. Serve immediately with dipping sauce. Enjoy!

Boil
Place dumplings into boiling water. When the dumplings begin to float, cook for an additional 5-6 minutes. Remove carefully with a slotted spoon. I tend to think this is best served in soup. In Beijing, though, they’re just eaten as is dipped in some vinegar. Traditional Beijingers even drink the flour water that the dumplings were boiled in!

Steam
Bring 3 cups of water to a boil in a large wok. Place dumplings into a bamboo steamer basket and place into the wok. Steam for 8 minutes. Serve immediately.

_MG_2391 copy

_MG_2360 copy

_MG_2382 copy

why i love thanksgiving

Last year’s turkey.

This year, my sister convinced her husband and in-laws to have a traditional American Thanksgiving dinner, so she’s making turkey on her own for the first time. She called me up, asking for tips and recipes. She talked about how excited she was for the Thanksgiving meal and how she wished we were making it together. I felt oddly like a proud mother, eager to see how her first turkey would turn out. And we both found ourselves wondering how exactly we got so deep into a culture so not our own.

For years we told ourselves we didn’t care for turkey. We were perfectly content with our Thanksgiving banh hoi or lamb hotpot or bun bo hue. But somewhere along the way, I changed my mind. In recent years, I’ve realized that I look forward to traditional Thanksgiving dinner more and more. I don’t live near family, and even if I did, almost all of my and my husband’s extended family is Asian, so I don’t have that problem of multiple Thanksgiving dinners in a row — if I even get a traditional Thanksgiving dinner at all. The whole thing is still rather novel to me. My enthusiasm has yet to extend to pumpkin pie or cranberry sauce, but I do so love the sweet potatoes with toasted nuts and browned, bloated marshmallows that are crisp on the outside and foamy on the inside; the creamy mashed potatoes with gravy made from pan drippings; and most of all — the turkey.

My sister and I spent most of our childhood Thanksgivings at church… eating Chinese or Vietnamese food. We also lived in Canada, where I feel Thanksgiving (which falls on a Monday in October) does not have quite the weight that it does in the US.

When we moved here at the start of my high school years, I was a bit surprised at how much effort families took to be together for Thanksgiving — it seemed like a bigger deal than even Christmas. True, this is a four-day holiday here, rather than Canada’s three-day. But still, the hoopla that surrounds these four days! I mean, a parade for Thanksgiving? And then there’s the football (and what could be more American than that?). And the whole Black Friday madness (the Canadian equivalent is Boxing Day, which falls after Christmas). Even the unofficial rule that no Christmas songs or decorations should make an appearance until after Thanksgiving adds to the grandiosity and anticipation of the weekend, like two holidays rolled into one. In Canada, there was no such definitive and controversial dividing line between the two seasons (there’s still Halloween, after all!), whereas here, putting up the Christmas tree together on the Friday after Thanksgiving can be a ceremony in itself.

Mise en place.

Ironically, the first traditional sit-down Thanksgiving meal I ever had was in southern France, where I spent the holiday with a kind American missionary couple whose church I attended. I was 20 years old, still fully Canadian but also an American resident by then (I’m now a dual citizen), and I spent the day helping the family cook — roast turkey, mashed potatoes, stuffing, candied sweet potatoes (which I had for the very first time), pumpkin pie, even cranberry sauce out of cans that had been brought over from the motherland long ahead of time and carefully stored for the occasion.

Newly inducted into this holiday tradition, when I returned to the US for my remaining college years, I roped my sister into helping me make turkey together for Thanksgiving at home. Perhaps it was because American food was our realm, not our parents’, whose style eschewed exact measurements. Telling my dad, who tests for flavor by tasting raw meat, that he has to stick a thermometer into the turkey to check for doneness is just a lost cause. Even now, many of my relatives still opt for seafood or fancy Asian food for Thanksgiving, and I might too if I spent the holiday with extended family and in a town where more Asian ingredients were available. Just last month, my parents spent Canadian Thanksgiving with relatives in Toronto, and my uncle ordered a whole roasted suckling pig! I’d have no trouble giving up the turkey in that case — but I have to say, I don’t think I’d want to do it every year.

Since I’ve been married, turkey has always been part of my Thanksgiving, and I kind of like it that way. In fact (and this is actually a rather embarrassing confession), I find myself taking greater measures each year to ensure that I get my fill of turkey during this holiday, which sometimes includes either getting my own turkey (if I’ve spent Thanksgiving at someone else’s) or getting an additional turkey on Friday, when prices are slashed.

Now before you judge me, please hear me out…

First, you might have noticed from previous posts how much I love chicken. I can eat chicken every day forever. So, turkey is a lot like a really big chicken.

Second, when my sister asked me yesterday if there is really any difference between chicken and turkey, I told her, yes, turkey is bigger. Which is obvious, but what this means is that you get more of your favorite parts — skin! wing! bones! I also told her this means it’s worth investing more time and effort into making than your average chicken, which means you get an even nicer-tasting bird and more of it. I have taken to brining my turkey, which helps it stay moist and flavorful. I also feel like turkey develops a smokier taste than chicken (and in Chinese, turkey is literally “smoky chicken”).

Third, and this is the Asian in me talking, I can’t stand eating big slabs of boneless meat! I happen to love slowly gnawing away on bones until they are all picked clean. Can you imagine doing that at the Thanksgiving table? (This may sound rather labor-intensive or simply disgusting to non-Asians, but really, there are fewer pleasures in life than eating meat on the bone.) This is why I like to have turkey (with bones) in reserve for eating in the comfort of home, even better in my pajamas. The big portions of boneless meat (like the breast) I save to turn into other dishes.

Fourth, I am very possessive about my turkey carcass. I nearly freaked out one year when someone almost threw my entire turkey carcass (which actually had quite a bit of meat on it still) into the trash. Whatever bones I do not get to are saved to make soup… which in turn gets made into turkey jook (congee or rice porridge).

So, you see, whether I’m spending Thanksgiving at someone else’s house and I have not made the turkey, or I have guests over and (like the dutiful Asian hostess) want to be sure they have more than enough to eat and leftovers to bring home with them, everything works out with the simple solution of buying turkey at reduced prices the next day. Instead of going shopping, I stay home and roast turkey on Black Friday. You could say it’s in keeping with the American tradition of excess. Or maybe that is just our family tradition of excess when it comes to food.

Plain old classic American Thanksgiving turkey, just the way I like it.

Now, at thirty years of age, sixteen years of living in this country, and actually only two years of roasting turkey on my own for the main Thanksgiving dinner, I guess I’m still somewhat of an American Thanksgiving novice. Each year I’m surprised to find myself adopting more and more of the customs, like getting up early to hunt for Black Friday DVD deals or switching to full-on Christmas mode (but no football, please). Because I’m normally quite particular about how I identify myself, I’m actually rather shocked at my complete lack of desire to incorporate elements from any of my other cultural heritages into Thanksgiving (with the one exception of making turkey jook the day after). I’m still very much a fan of the classic Thanksgiving dishes, like sage roasted turkey. I’m reluctant to sneak in a single Asian- (or other ethnic-) inspired dish or even ingredient to shake things up, make the menu more updated, contemporary, multicultural, PC, what have you. No, Thanksgiving is one of those rare times when I fully and unabashedly embrace my American self. And I quite enjoy it.

Thanksgiving Roast Turkey
Serves 10-12, or 2 for 5-7 days :)
Adapted from various sources

Here is the recipe I’m giving my sister for a 14- to 16-pound turkey. Another option for getting moist turkey without brining it is to roast it breast-side down, so the back fat runs down to baste it (this results in a less pretty whole turkey, but is ok if you serve it already carved). But I love the skin, and I think the skin on the breast side is less fatty and gets crisper when roasted breast-side up, so I prefer to brine.

Because I live in a teeny tiny apartment and have no room for such things as a roasting pan, I just buy a disposable aluminum one and place a steaming rack (the kind you put inside a rice cooker or wok to steam dishes) inside. Then I position the turkey on top of the rack.

Aside from the salt and sugar proportion, the rest of the ingredients are pretty flexible. I use less salt than most recipes, to make sure the turkey doesn’t end up too salty (I serve it with gravy anyway), and I only brine overnight and rinse it thoroughly before roasting. I also like to use brown sugar and apple cider vinegar — the same two things my family uses for wetting rice paper to make spring rolls brown and crispy.

Brine:
2 gallons water
3/4 – 1 cup kosher salt, depending on how long you brine (use the lesser amount if brining longer); use half the amount for table salt
1/2 cup light brown sugar
1 cup apple cider vinegar
(optional: 1-3 cups of orange juice or apple cider; cut back some on the water in this case)
1 orange, including peel, cut into slices
1 Tbsp or a small handful of black peppercorns, slightly crushed with mortar and pestle
1 onion, cut into chunks
8 cloves garlic, smashed
6 bay leaves
any other herbs, fresh or dried, you like (rosemary, sage, thyme, and parsley for example)
1 brining bag

Roasting:
1 14- to 16-pound turkey
olive oil or melted butter to rub
2 lemons
1 large onion, cut into chunks
2 ribs celery, cut into 2-inch sections
1-2 carrots, cut into 2-inch sections
1 apple, quartered
fresh or dried herbs (rosemary, sage, and thyme, for example)
1-2 cups chicken/turkey stock, apple cider, or white wine, or a combination of these (optional)

Gravy:
pan drippings
2 Tbsp flour
turkey giblets for turkey stock (optional)
any combination of chicken/turkey stock, apple cider, cream, or milk (optional)

1. Brine: Put all of the brining ingredients (except the bag, obviously) into a stock pot and bring the whole mixture to a boil, stirring to make sure the salt and sugar fully dissolve. Turn off the heat and let the mixture completely cool. Remove the bag of giblets from the turkey (reserve for stock or gravy), and rinse and clean the bird. Put the turkey in the brining bag and pour in enough of the cooled brining mixture to completely cover the turkey (if there isn’t enough liquid to cover, just add more water). Put the whole bag in the refrigerator overnight, for about 8 hours. I try to stand the turkey on one end, either in a large pot or propped between other large items in the fridge, so that it stays fully submerged in the brine. Otherwise, if it’s only partly submerged, you’ll want to flip the turkey halfway through its brining time to make sure it brines evenly.

2. Roast: Preheat oven to 450°F. Take the turkey out of the brining liquid and discard the brine. Rinse the turkey thoroughly under cold water. Pat it dry with paper towels. (If you have time, you can also put the turkey back in the fridge uncovered at this point, to let the skin air-dry, which will make it crisper when it roasts.) Rub the outside of the turkey with olive oil or melted butter, massaging some of it under the skin into the flesh. Squeeze some lemon juice into the cavity of the turkey. Prick 1 whole lemon with a fork and stuff it inside the cavity, along with any remaining lemon after squeezing and most of the onion, celery, carrot, apple, and herbs (you can also insert some of the herbs underneath the skin). Stuff the remaining aromatics into the neck cavity. Truss the bird first by folding the flaps of skin over the cavities on both ends and securing with small metal skewers, then tucking the wings under the neck/shoulders and tying the legs together with kitchen string. You can add a cup or two of chicken stock (or turkey stock made from the giblets, or combination of that and white wine or apple cider, keeping in mind this will also flavor your gravy) to the bottom of the pan to keep any drippings from burning or evaporating too quickly. Roast the turkey according to any directions on the package, or at 450°F for 40 minutes, and then at 350°F until the breast meat reaches 160°F and the thigh meat 170°F (about another 4 hours or more, depending on how big your turkey is). Alternatively, try this Alton Brown flash cooking method — 30 minutes at 500°F, then about 2 hours at 350°F. When the turkey reaches the appropriate temperature, tent loosely with foil, and let it rest for 30 minutes before carving, so that the meat continues to cook a bit and absorb the juices (if you cut into it immediately, the juices will all run out). If carving ahead of time, prepare a piece of foil to cover the dish you’ll serve the sliced turkey on. As you carve, have someone help you lift and replace the foil as you add turkey slices to the dish. This will help keep the meat warm.

3. Gravy: While the turkey rests, make the gravy. Pour all but about 2 tablespoons of the pan drippings into a fat separator or another container. Set the pan over two burners on medium heat. Add 2 tablespoons of flour to the remaining drippings and whisk together to form a roux. Scrape up any brown bits stuck to the pan. Stir until all lumps are gone and the roux begins to brown. Slowly whisk in some combination of the reserved pan drippings (with fat removed), apple cider, chicken or turkey stock, cream, or milk — enough to get about 2 cups of gravy. Scrape up any brown bits still stuck to the pan. If there are still lumps in the gravy, strain through a sieve. Check for flavoring and, if necessary, add salt and pepper to taste (it should already be a bit salty from brining).

4. Give thanks!