5 articles Articles posted in dessert

A Hike Through the Rainforest + Mango Ice Cream

1

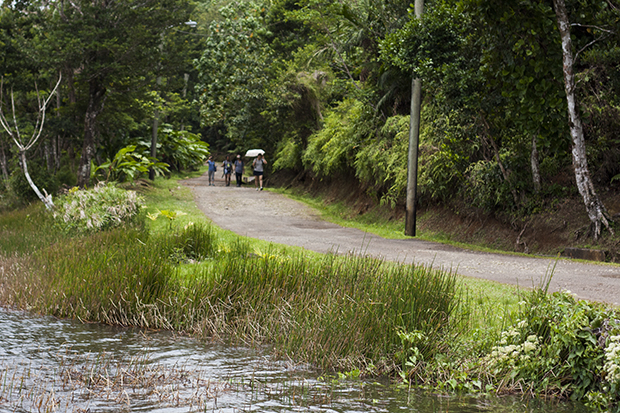
My friends and I took a hike through some of the towns and rainforest areas of Grenada last week. We brought along two local friends whom we met from our frequent trips downtown to the Spice Market to be our guides. We hopped on a local bus, and because of some miscommunication, ended up walking a great deal more than we had signed up for. A word of advice: never believe a Grenadian when he tells you there’s only one more hill to climb. He really means one hill before the the next hill…before the one after that. And then five more.

Fortunately, aching limbs and tired bodies weren’t the only things we got out of the hike though. Because we ended up walking to the rainforest (instead of riding the bus), we had the chance to see life in Grenada through the eyes of a local. Grenada is such a small island, our guides knew practically every person we met along the way! As we walked, I soon realized that walking through Grenada is very much like taking a stroll through a fruit garden.

2

4

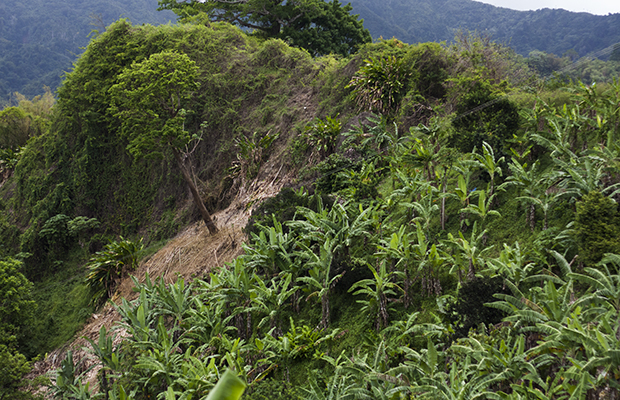
We passed by banana plantations and also saw several banana trees up close.

3

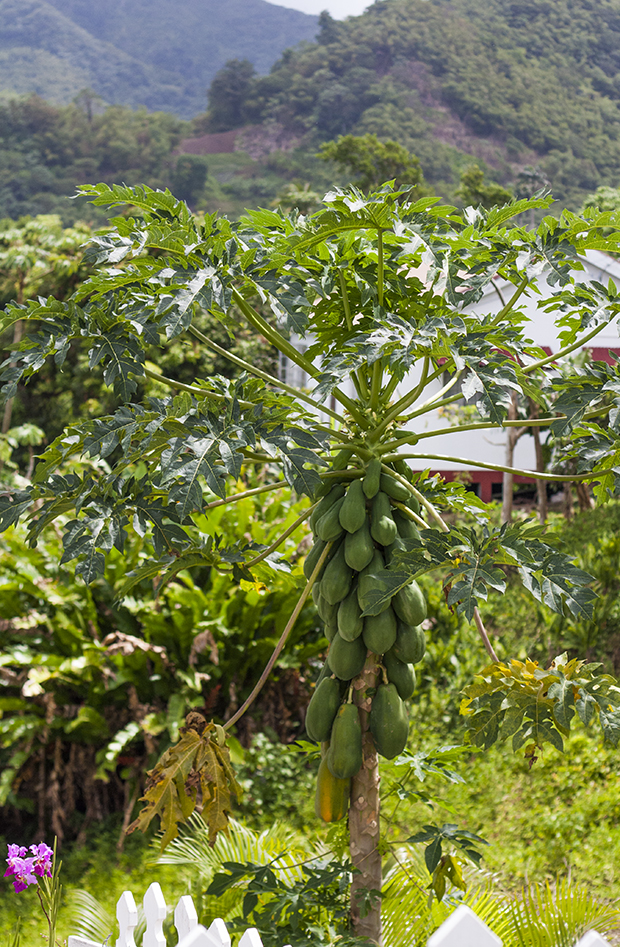
We saw papaya trees heavy with fruit that were getting ripe for picking.

5

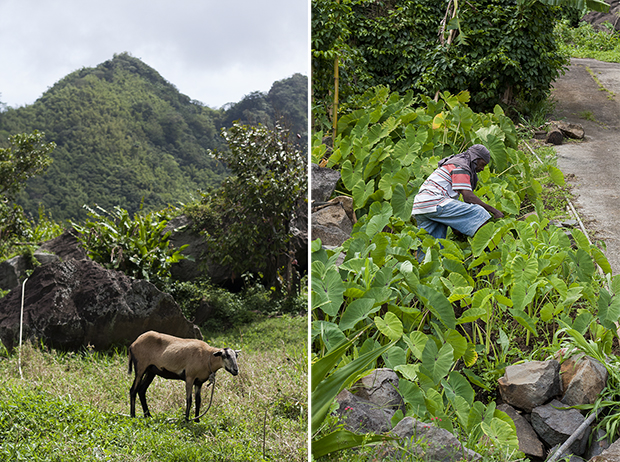
We also saw many goats like this one that probably provides milk for a family, and we saw a man tending a callaloo garden (callaloo is used much like spinach here!).

6

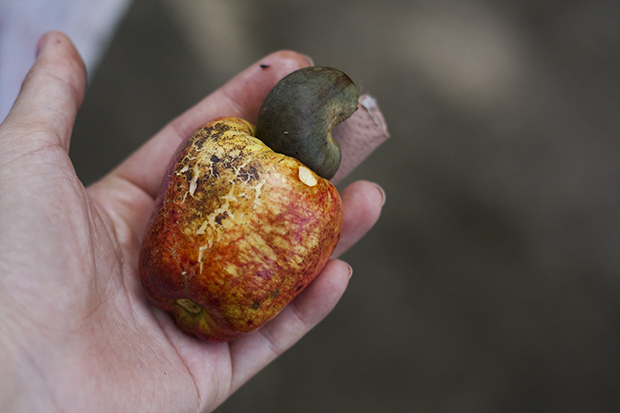
I tasted a cashew fruit for the very first time and was surprised to find that it was sweet, juicy, and delicious!

7

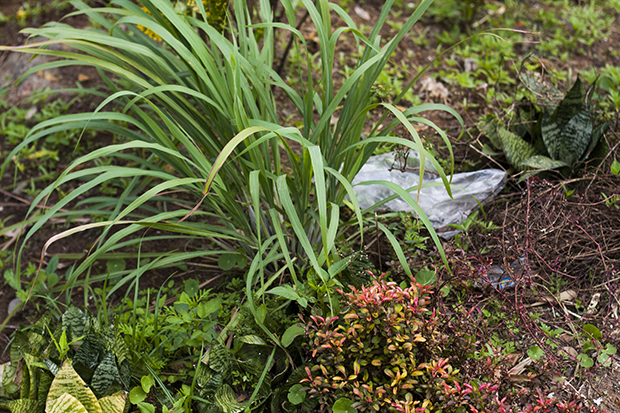
We passed by lemongrass and picked a few leaves to smell the fragrance.

8.5

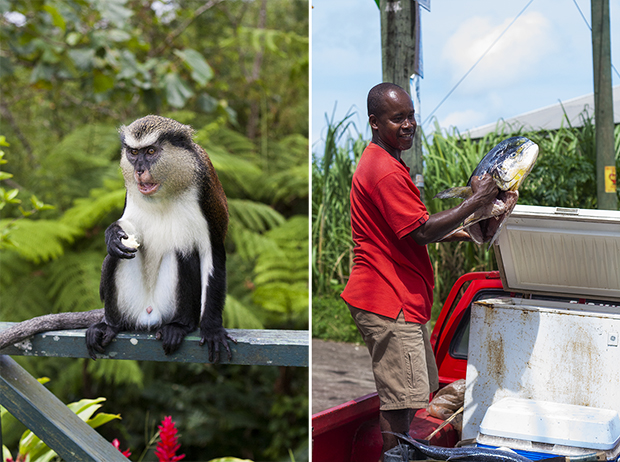
And of course, what’s a trip to the rainforest without seeing monkeys?! On the right is a wandering fish market that sells fish from the back of a pick-up truck.

8

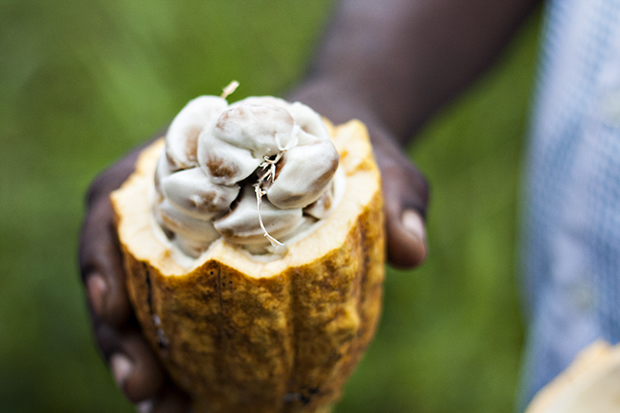
We also saw plenty of cocoa trees along the way. This is a cocoa pod filled with cocoa beans. The sweet pulp can be sucked off, and then the beans are fermented and dried in the sun to make chocolate.

9

A cabbage garden in front of a local Grenadian house.

10

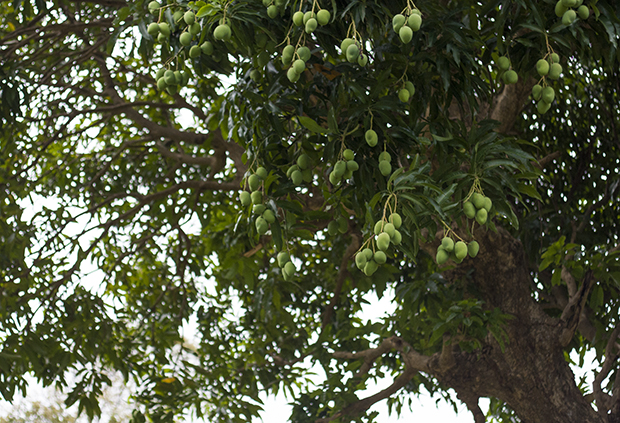
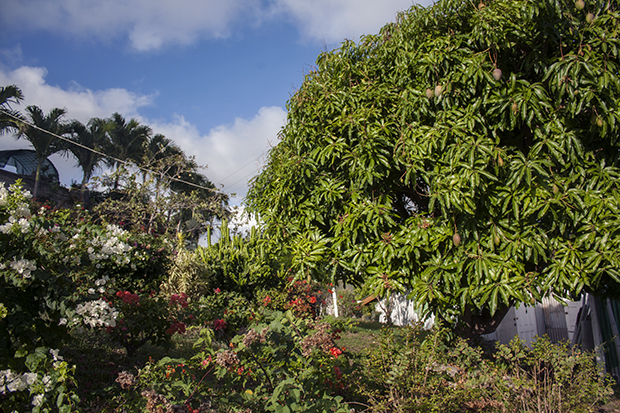
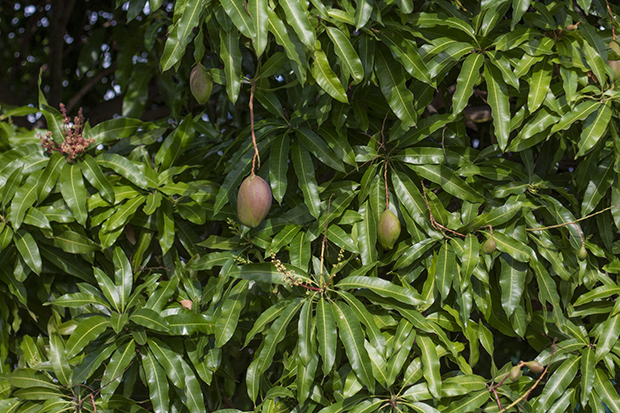
And aside from bananas, mangoes are the most plentiful fruit here in Grenada! You’ll find mango trees in backyards, on the side of the roads, in the rainforest…everywhere.

11 12 13

So what to do with all those mangoes? Make mango ice cream! The following recipe uses mango as the main fruit, but it could easily be substituted for your favorite tropical fruit — soursop, durian, jackfruit. Anything that turns creamy and soft would be perfect for this recipe.
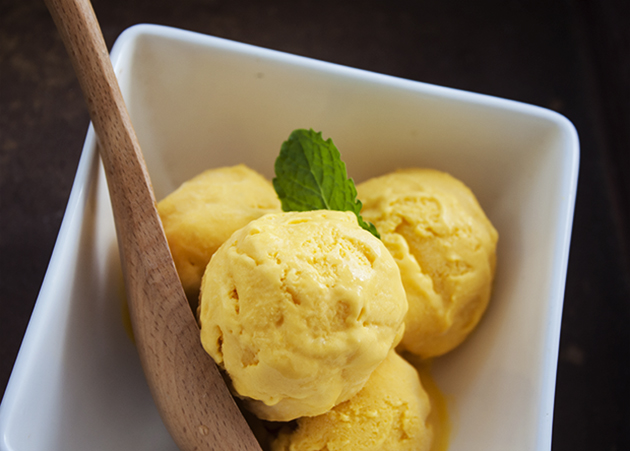
_MG_9362

Mango Ice Cream
Yield: 1.5 quarts

Ingredients:
4-5 mangoes (about 4 cups of pulp)
1 1/2 c. heavy cream
1 1/4 c. whole milk
3/4 can condensed milk
juice from 2 small limes

1. Peel the mangoes and puree the pulp into a smooth consistency. Remove any strands of fiber that you might see.

2. Stir in the heavy cream, milk, and condensed milk into the mango puree.

3. Squeeze in the juice of 2 limes. Mix thoroughly.

4. Pour into an ice cream maker and follow directions or follow David Lebovitz’s method for making ice cream without a machine. The condensed milk, heavy cream, and whole milk really help to prevent the mixture from turning icy or freezing rock solid. You can also pour the mixture into popsicle molds to make creamy mango-sicles!

_MG_9384


Food Matchmaking: Toast Loves Condensed Milk

You can’t really ever go wrong with condensed milk. Its sweet, milky creaminess makes it a good addition in just about everything – smoothies, milkshakes, ice cream! But my very favorite combo is buttered toast and condensed milk. This is a classic Cantonese treat that can be found at many Hong Kong tea houses, where you’ll find people snacking on them for breakfast, at tea time, or as a late-night snack. It’s particularly yummy on extra thick, soft cushiony bread.

Don’t you think this earl grey milk jam would taste divine on toast too?

Images from here and here.

durian sticky rice

A few weeks ago, I was at Grand Mart and decided to pick up a small durian in lieu of a pineapple for my 33-week belly shot. I knew at some point I wanted to incorporate a durian into the series. :)

Best part, of course, was that I got to eat the durian afterward. Actually… confession: My husband and I might’ve dug into the durian before remembering that we’d bought it for a photo. :P Luckily, we’d only pried open one side, so when we realized what happened, we closed the husk back up and simply shot the durian from its good side (shhh). :)

Durian sticky rice is popular in Southeast Asia, especially in Malaysia and Singapore. It’s similar to mango sticky rice, so I actually just adapted this from that recipe. What makes it even more delicious is that the custardy texture of the durian allows for it to be mixed right into the coconut-milk-drenched rice, resulting in the most luscious, creamy, fragrant rice pudding I guarantee you’ll ever have tasted (if you like durian, that is).

Incidentally, given that I’m at 38 weeks and theoretically ready to deliver any day now, I just wanted to say I’ll be taking a bit of a break from this blog for the next few months. I do have a few posts saved up that I’ve scheduled to publish over the next little while, though, so don’t go away! Becca will also be around with a few things up her sleeve. Until then, happy eating, friends!

Durian Sticky Rice
Adapted from Real Thai Recipes
Serves 2

Last time, I made my sticky rice in the rice cooker. This time, I tried steaming it in a pasta pot with the pasta insert. You can also try using the steamer insert, but I used the pasta one because it sits lower in the pot, which I figured would allow the rice to cook more easily. Of course, if you have a bamboo steamer, that’s the way to go. And last time some friends also mentioned simply cooking the rice in the microwave. I also eliminated the step of making the coconut sauce separately and instead just used the same coconut mixture both incorporated into the rice and drizzled over top.

1 cup glutinous rice (also called sweet rice or sticky rice)
1 1/2 cup coconut milk
1/4 tsp salt
2 Tbsp sugar
1/2 tsp cornstarch
1 Tbsp water
toasted sesame seeds, salted fried mung beans, or toasted crushed peanuts (optional)
1/4 whole durian (or pods from 2 sections of the durian)

1. Soak the sticky rice in water for at least an hour and up to overnight.

2. Line a steamer pot or bamboo steamer with cheese cloth (you can also use banana leaf). Boil water in the pot below the steamer, and allow the rice to steam for about 20-30 minutes.

3. Meanwhile, heat the coconut milk in a saucepan with the salt and sugar. Stir over low heat until dissolved.

4. When the rice is cooked, spread it in a shallow bowl or pan and slowly add the coconut milk mixture about 1/4 cup at a time, each time stirring well to fully incorporate the liquid, until about 1 cup has been added. Make sure there are no pools of coconut milk in the rice; the liquid should be fully absorbed. Cover and let the rice sit for about 10-15 minutes to keep absorbing the coconut milk.

5. Dissolve the cornstarch in 1 tablespoon of water. Add to the remaining coconut milk mixture on the stove, and stir until the mixture thickens.

6. Pry open the durian with a flat screwdriver and hammer, or cut into it with a sharp knife. Remove the pods from two of the sections and arrange on one side of each plate. Arrange the sticky rice on the other half of each plate. Top the rice with the thickened coconut sauce and sprinkle with toasted sesame seeds, fried mung beans, or toasted crushed peanuts.

frozen yogurt without a machine, or a tribute to chuck

Recipe for frozen yogurt without a machine coming up just as soon as I explain who Chuck is.

If you’ve seen the TV spy comedy drama Chuck, you may be able to appreciate this post. Otherwise, this will probably seem incredibly dorky to you, but I won’t hold your questionable taste against you. :)

My husband has been a devoted Chuck fan since the show first started and through when it was threatened with cancellation and was subsequently saved by a Subway campaign started by his (and now my) favorite TV critic, Alan Sepinwall (to whom the first line of this post pays homage). I started getting into the show during season 2, and I have to say, by the time the Intersect 2.0 entered the picture, I was firmly hooked.

When I discovered that one of my out-of-town friends is a fellow Chuck fan, I told her we must have a Chuck party next time she’s in town. And that is exactly what we did this past Monday.

My first mission was to secure a tub of cheese balls (which was all Chuck ate for a time while he was in a funk), which I remembered seeing at Target. My sister obviously couldn’t be here for this but wanted to contribute by sending me a pattern to make my own cheese-ball boxes (I didn’t have card stock on hand, so I used old manila folders and then used my rotary cutter to make the ridges). (Update: Get the DIY tutorial here.) She even made me little signs in the Chuck font to label each of the dishes in the style of the episode titles. I told her next time Chuck is threatened to be canceled she should put together DIY Chuck party packages.


We had hot dogs in tribute to the Wienerlicious where Sarah (Chuck’s CIA handler and love interest) worked as her cover.

Chuck vs. Wienerlicious

And, of course, how could we have a Chuck party without the product that saved the show… Subway.

Chuck vs. Subway

After the first season, for some reason the Wienerlicious that Sarah used to work at got turned into a frozen yogurt place. Playing off the names Pink Berry and Red Mango, the show’s writers cleverly named this yogurt place the Orange Orange. So I thought fro-yo would be perfect for dessert, but the only problem was, I don’t have an ice cream maker.

After digging around a bit, I found a recipe for how to make ice cream without a machine and decided to give it a try. It didn’t turn out with quite the tang of actual fro-yo, and I had a little trouble getting it to freeze to the right consistency. We ended up eating it more soft-serve style, with toppings on the side. Add to that a bit of Jeffster and a lot of Awesome (and an Awesome junior!), and I think it turned it turned out nothing short of perfect.

Frozen Yogurt Without a Machine
Adapted from David Liebovitz and 101 Cookbooks
Serves 3-5

2 32-oz tubs of regular yogurt (or use Greek yogurt if you don’t want to drain)
1 cup white sugar (this turned out a tad too sweet for me but may be right for some)
1 tsp vanilla extract

1. Scoop the yogurt into a colander lined with cheesecloth and set over a bowl to catch the drippings. Let yogurt drain overnight in the fridge. From 2 32-oz tubs, I ended up with 4 cups of thick, creamy yogurt after draining.

2. Mix in the sugar and vanilla. Stir well.

3. Chill a bowl or a baking dish in the freezer and then pour the drained yogurt into it. Put the yogurt into the freezer. I found that my yogurt took a while to freeze in a bowl, so midway through I switched to a shallower baking dish.

4. After 45 minutes to an hour, take the yogurt out and stir it vigorously with a spatula, whisk, or immersion blender. The more you break up the ice crystals as they’re forming, the smoother the frozen yogurt will turn out. Set back into freezer after stirring.

5. Continue to stir the yogurt about every half hour. I found that this was a bit frequent and would soften the yogurt again before it had enough time to freeze. Next time I may wait longer between stirs.

6. Keep checking and stirring periodically until the yogurt reaches the desired consistency. My yogurt took 4-5 hours to reach a soft ice-cream-like stage around the edges, with the middle still being rather soft.

7. Serve with toppings like crushed nuts, berries or other fruit, shredded coconut, chocolate shavings, crushed candy bars, and mint leaves. Best eaten immediately. Even better while watching Chuck.